Thumbnails in File Explorer make it easier for you to identify files even without opening the files. Sometimes, you may find that the file thumbnails are not showing up on your Windows 10 PC due to various reasons.
Several items can break your file thumbnails. An option in Settings, a faulty thumbnails cache, and corrupt system files are some of the reasons your thumbnails aren’t showing up in Windows 10.
Luckily, there are a few ways to get around this issue.
**Use the Supported View Type**
File Explorer offers multiple view types so you can view your files in your preferred style. But, some of these view options don’t offer thumbnails.
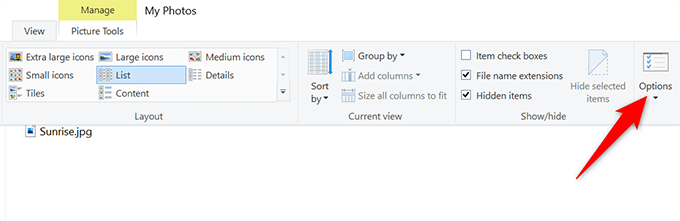
The following is how a picture folder looks without thumbnails.
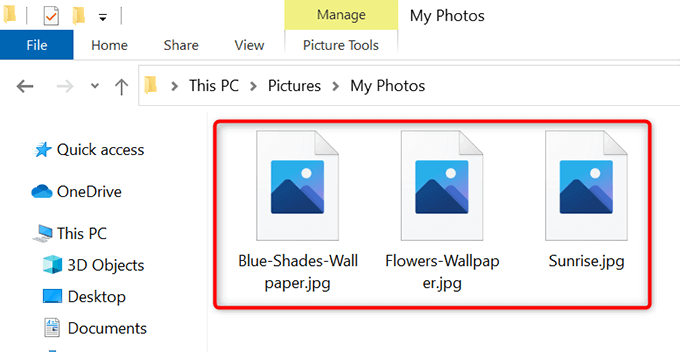
If you’re using one of these non-supported view types, that may be the reason you don’t see your file thumbnails.
Change the view type and that should resolve your issue:
- * Open the folder that displays no thumbnails for your files.
- On any blank space in the folder, right-click and select View.
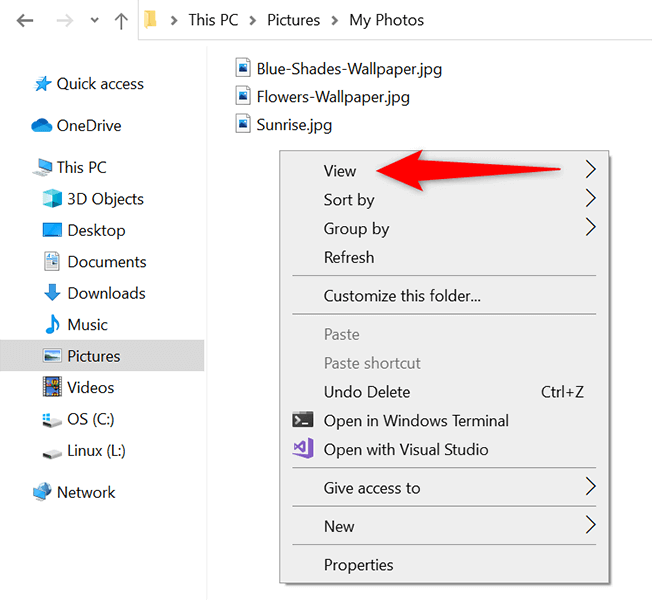
- From the View menu, choose a view that’s not **List** or **Details**. These two view types don’t display file thumbnails.

- You should now see your file thumbnails.
**Enable Thumbnails in File Explorer**
In the Settings app and File Explorer’s Folder Options window, an option hides and displays file thumbnails. If you or someone has modified this option, that’s a possible reason you don’t see your file thumbnails.
To fix the issue in this case, modify the option either in Settings or in Folder Options.
From Settings
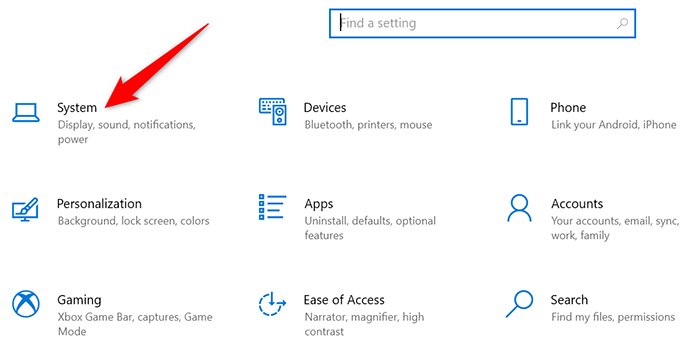
- Press the Windows + I keys at the same time to open Settings.
- Select System in Settings.
- Scroll down the sidebar on the left and choose **About**.
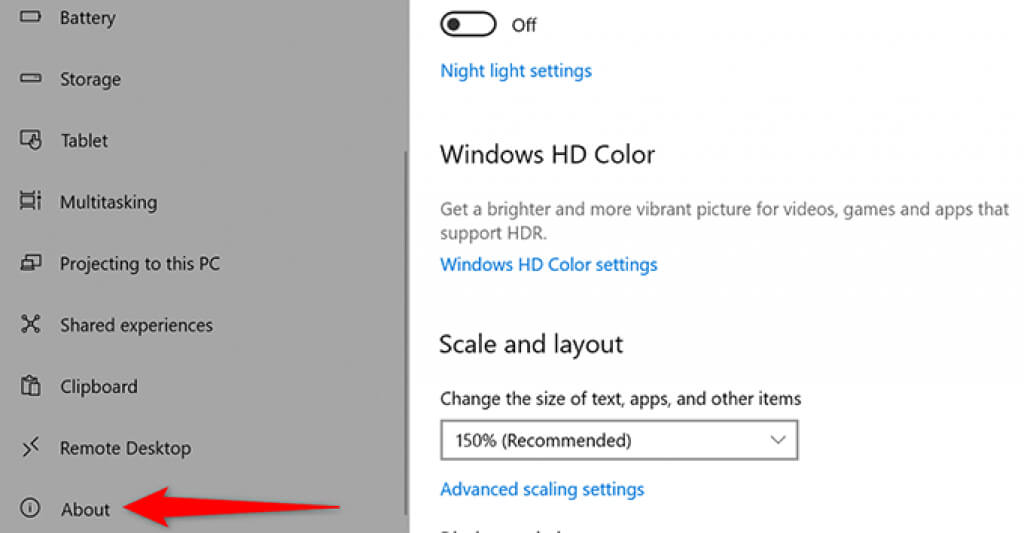
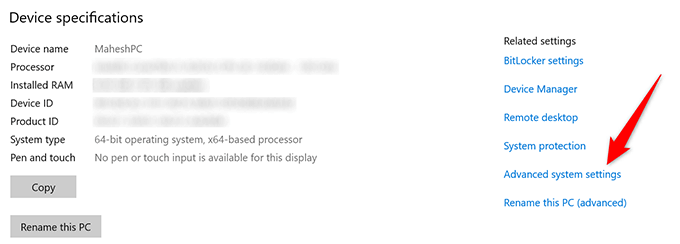
- In the **Related settings** menu to the far right of your screen, select **Advanced system settings**.
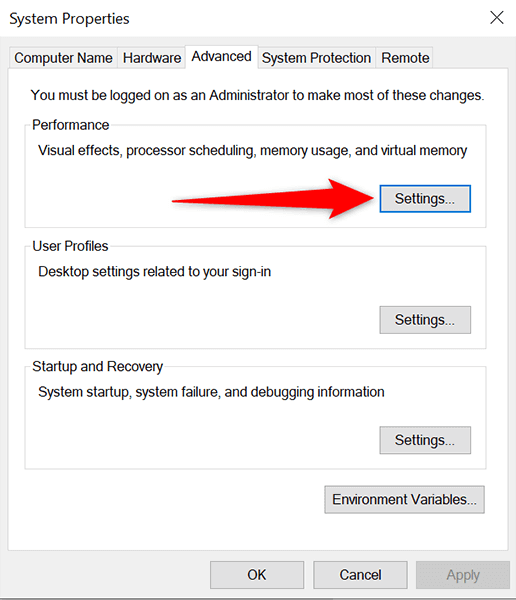
- From under the **Performance** section, choose **Settings**.
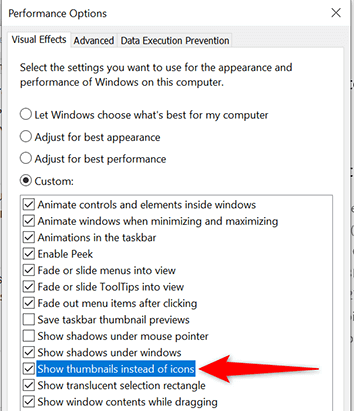
- Various options with a checkbox will appear on your screen. From this options list, find and enable the **Show thumbnails instead of icons** option.
- Select **Apply** followed by **OK** at the bottom of the window.
**From Folder Options**
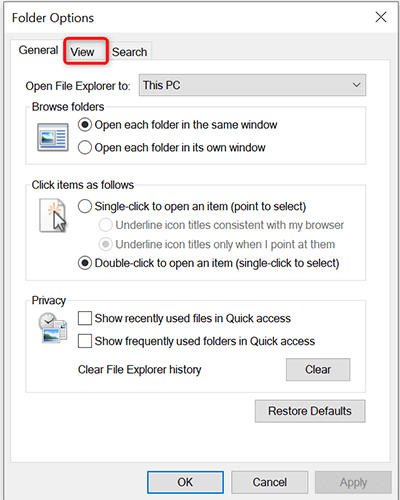
- Open a **File Explorer** window. * At the top of the window, select **View** and then select **Options**.
- In the **Folder Options** window that opens, select the **View** tab.
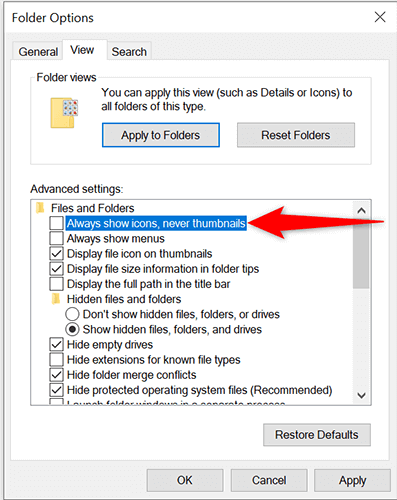
- Under the **Advanced settings** section, disable the **Always show icons, never thumbnails** option.
- Select **Apply** followed by **OK** at the bottom of the window.
**Rebuild the Thumbnail Cache**
Your Windows 10 PC uses the thumbnails cache to display file thumbnails in File Explorer quickly. If this cache has an issue, your thumbnails won’t appear properly.
Luckily, you can delete this cache without affecting any of your files, and Windows 10 will then automatically rebuild this cache for you. There are two ways to rebuild the thumbnail cache.
Using a Graphical Method
- Press Windows + E to launch a File Explorer window.
- In File Explorer, from the sidebar on the left, select This PC.
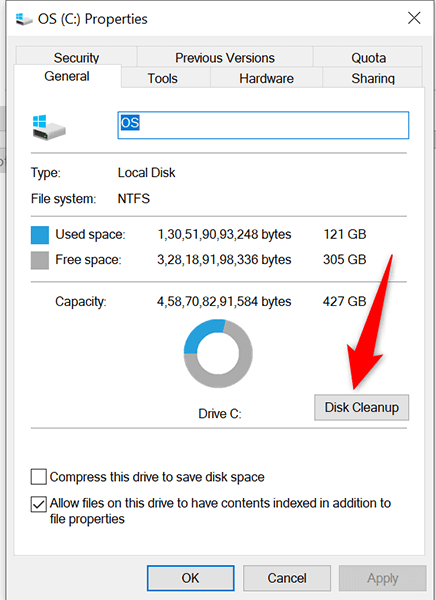
- Find the drive where you’ve installed Windows (usually the C drive), right-click this drive, and select Properties.
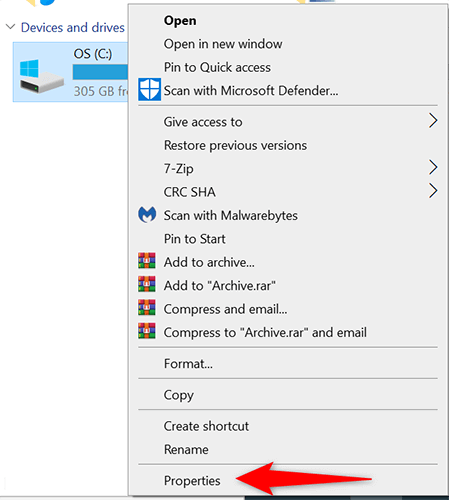
- In the Properties window, choose **Disk Cleanup**.
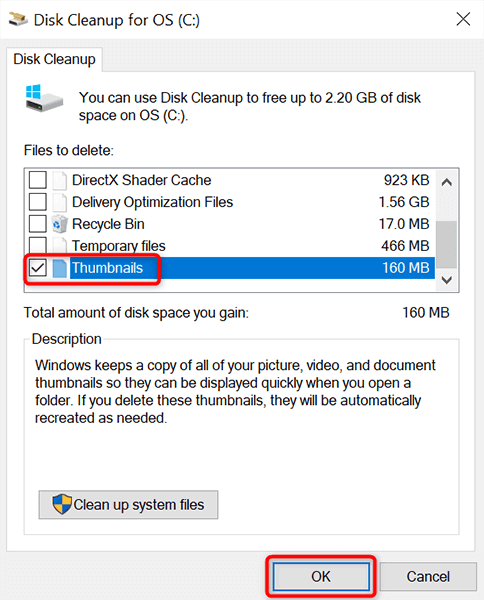
- A Disk Cleanup window will open. Here, in the **Files to delete** section, enable the **Thumbnails** option. Deselect all other options. Then, select **OK** at the bottom.
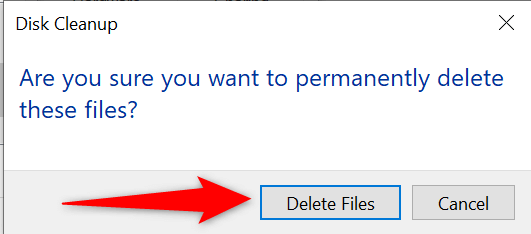
- A prompt will appear asking to confirm your choice. Select **Delete Files** in this prompt.
**Using Command Line**
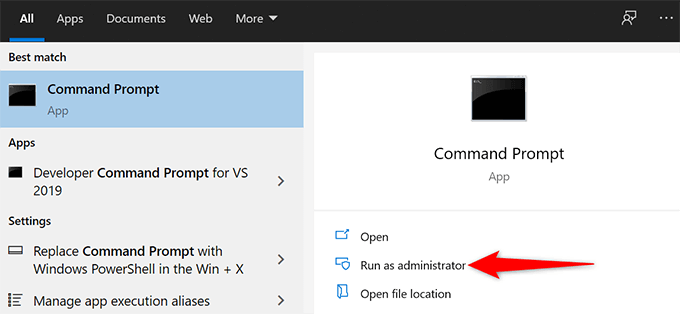
- Open the **Start** menu, search for **Command Prompt**, and select **Run as administrator** on the right.
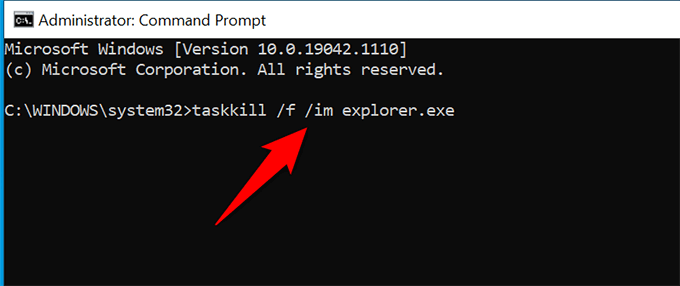
- Select **Yes** in the User Account Control prompt. * In the Command Prompt window that opens, type the following command and press **Enter**. This closes the File Explorer utility. ***taskkill /f /im explorer.exe***
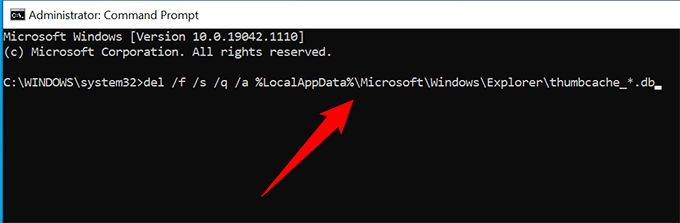
- Then, run the following command: ***del /f /s /q /a %LocalAppData%\Microsoft\Windows\Explorer\thumbcache_*.db***
- Relaunch File Explorer by running the following command: ***start explorer.exe***
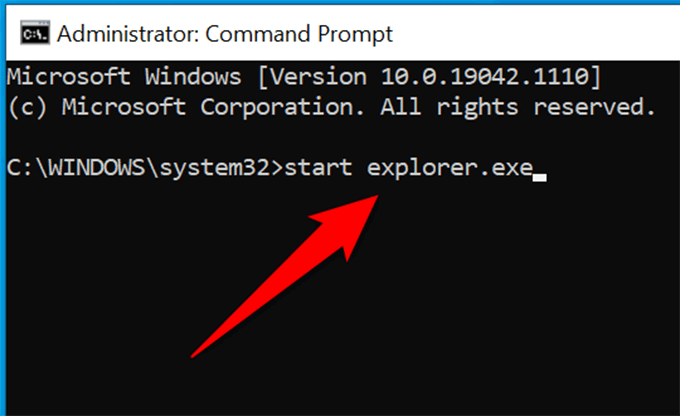
- You may now close the Command Prompt window.
Open a File Explorer window, and you should see your file thumbnails.
Change the Default App for a File Type
If you don’t see thumbnails only for a certain file type, it’s worth changing the default file viewer for that file to see if that fixes your issue:
- In File Explorer, find the file type for which you don’t see the thumbnails.
- Right-click that file type and select Open with > Choose another app.
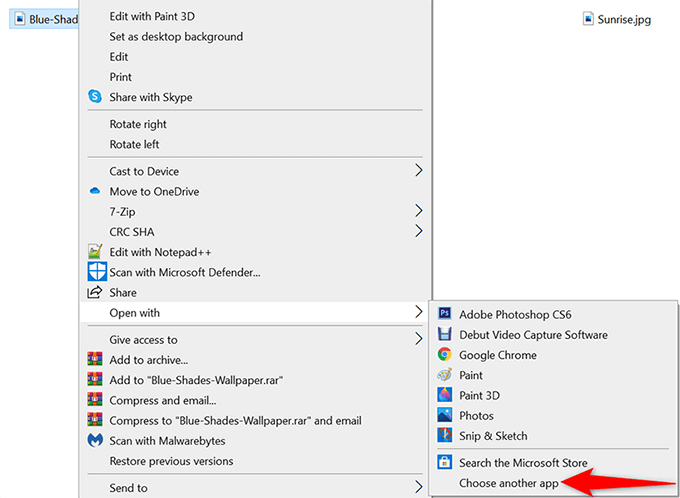
- In the box that opens, select an appropriate file viewer for the chosen file type. * At the bottom of the box, enable the **Always use this app to open .jpg files** (where **jpg** is the file type you’ve selected).
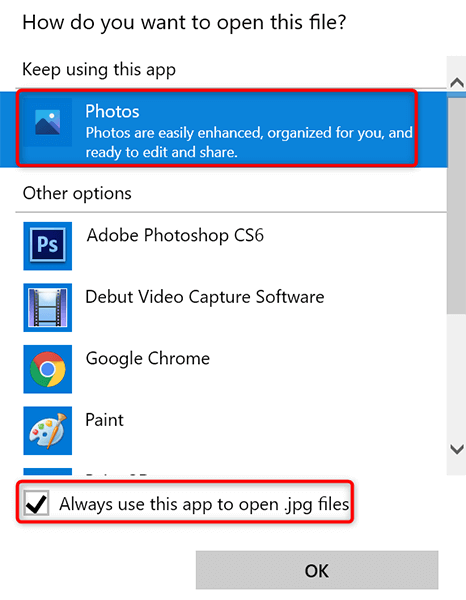
- Select **OK** at the bottom of the window.
**Scan PC for Viruses and Malware**
A malicious item like a virus can cause your PC to malfunction. In some cases, this causes various File Explorer elements to not show up, including thumbnails. If this is the case with your computer, you should run a virus checker and get rid of any viruses from your machine.
The good thing about Windows 10 is that it comes built with a virus scanner. This scanner is called Microsoft Defender Antivirus, and you can use this free tool to find and remove viruses from your system.
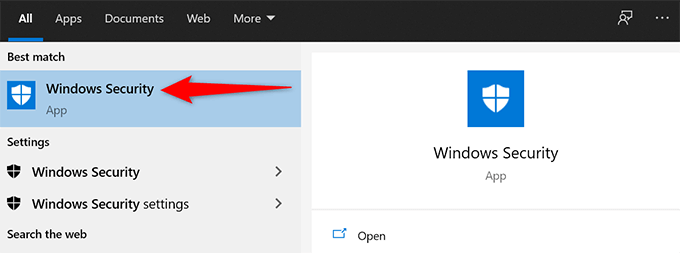
- Open the Start menu, search for Windows Security, and select that in the search results.
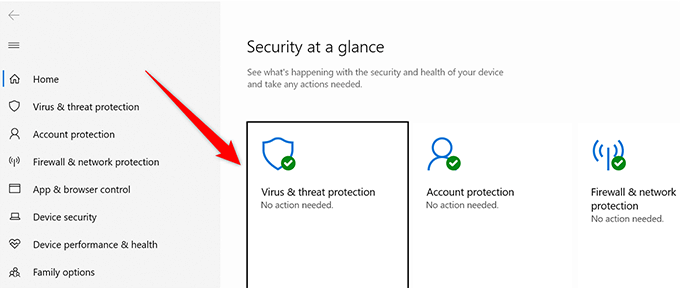
- Select **Virus & threat protection** on the screen that follows.
- Select **Scan options**.
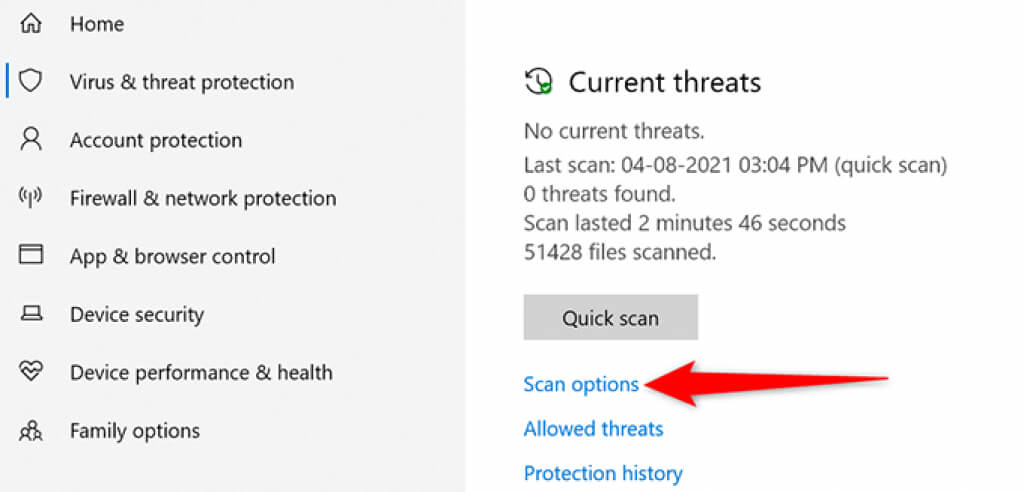
- Choose the **Full scan** option and then select the **Scan now** button.
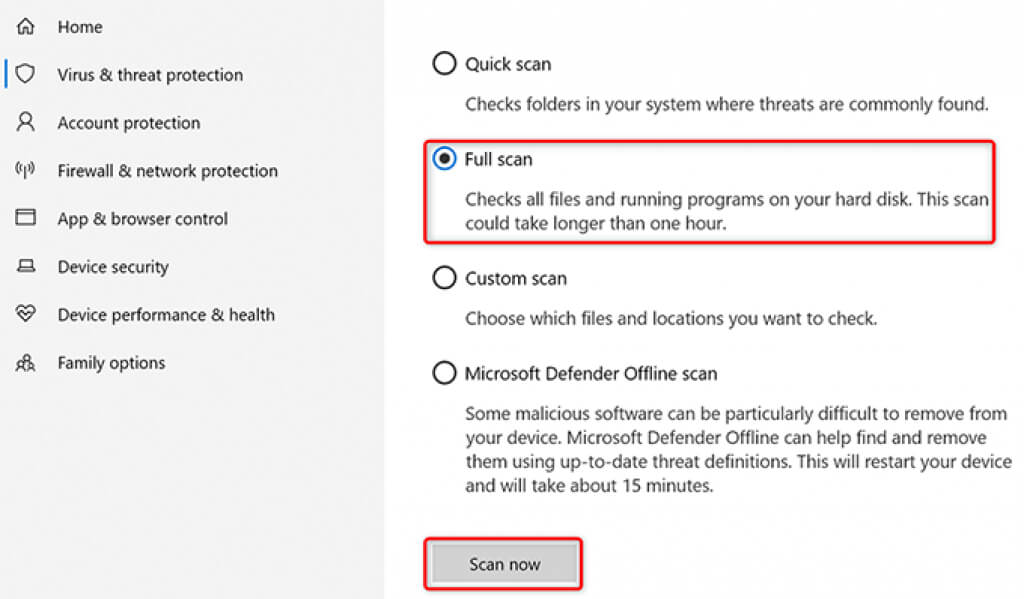
- Wait for Microsoft Defender Antivirus to scan your PC for any viruses and malware.
**Uninstall the Problematic App**
An app you’ve installed on your PC can also cause your thumbnails not to show up. If you’re experiencing the thumbnails issue right after installing an app, that app might be the culprit.
In this case, remove that app and see if your problem gets resolved:
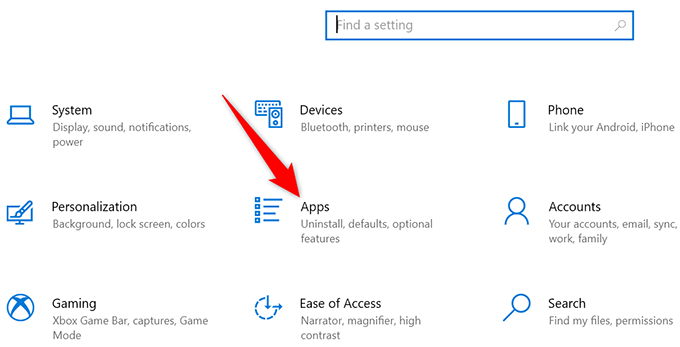
- Open Settings by pressing Windows + I keys at the same time.
- Select Apps in Settings.
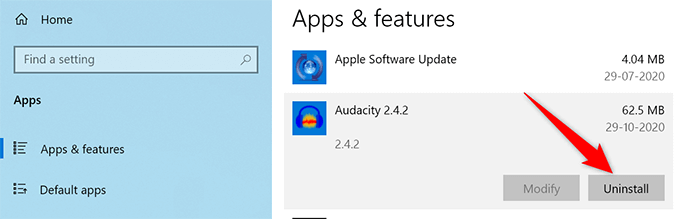
- On the **Apps & features** page that opens, scroll down the list and find your app. * Select your app in the list and then select **Uninstall**.
- From the prompt that appears, choose **Uninstall**.
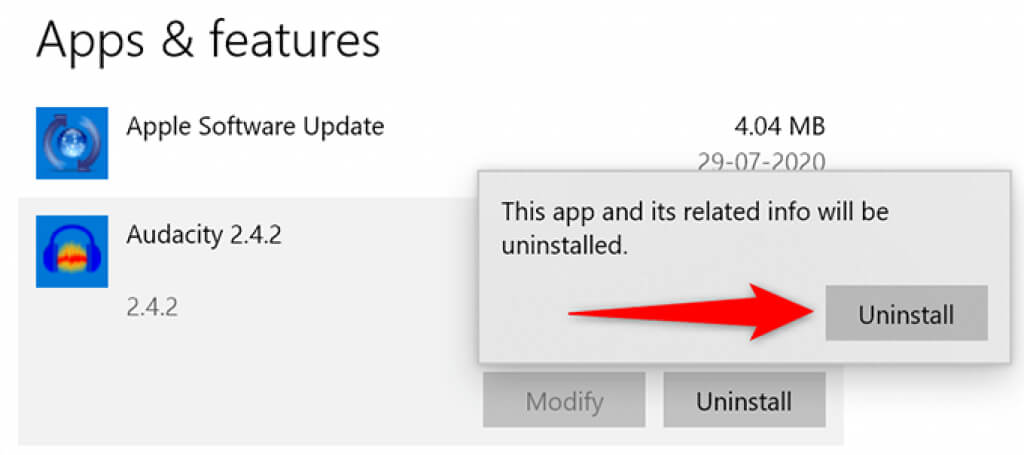
- Windows 10 will remove the selected app from your PC.
**Fix Corrupt Files**
Often, corrupt files cause various issues on Windows PCs, including causing File Explorer not to display any thumbnails. You don’t have to worry about anything if this is the case, as Windows 10 includes a command to find and fix corrupt files.
- Right-click the Start menu icon and choose Command Prompt (Admin) from the menu.

- Select **Yes** in the User Account Control prompt. * On the Command Prompt window, type the following command and press **Enter**: ***sfc /scannow***
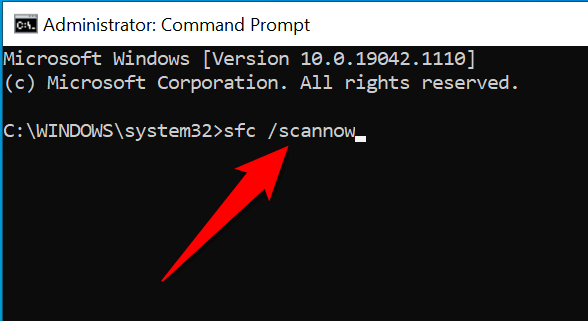
- Wait for Windows to find and fix corrupt files on your computer.
**Reset File Explorer Options**
It’s worth resetting the File Explorer options to see if your file thumbnails come back. Doing so should fix any improperly configured options in the File Explorer settings.
- In a File Explorer window, select View at the top and then choose Options.
- Select the View tab in the Folder Options window.
- At the bottom, choose the **Restore Defaults** button.
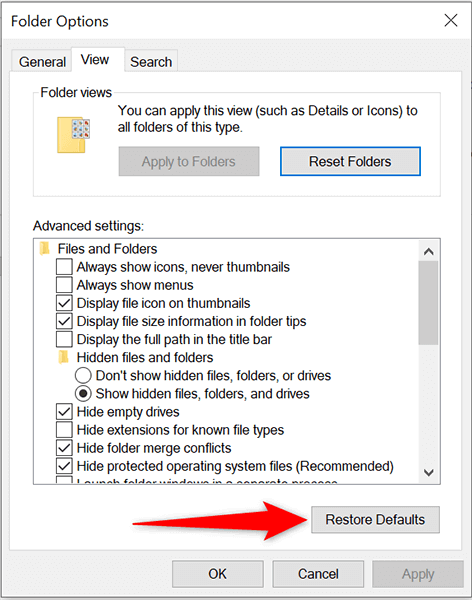
- Select **Apply** followed by **OK** at the bottom.
**Free Up Space on Your PC**
To create and save file thumbnails, File Explorer needs disk space on your computer. If your PC is running out of space, that may be the reason you don’t see your thumbnails.
To fix this, check out our dedicated guide to free up disk space in Windows 10. The guide offers tips to get rid of unwanted files and reclaim your precious storage.
And that should fix the issue with file thumbnails on your Windows 10 PC. If it did, don’t forget to let us know what method worked for you in the comments below.