One of the most commonly used statements in nearly every programming language is the IF statement. So it should come as no surprise that using IF and nested IF statements in Google Sheets is very popular and very useful.
The IF statement in Google Sheets lets you insert different functions into a cell-based on conditions from other cells. When you nest IF statements, you can create more advanced analytics based on data. In this article, you’ll learn how to do this as well as see a few examples.

Using the IF Statement in Google Sheets
Before you can get fancy and start nesting IF statements, you need to understand how a simple IF statement works in Google Sheets first.
The easiest way to understand this is with an example. For our first example, imagine you pulled a list of mountains you’re thinking of hiking from the internet, along with their altitude.

You’re only interested in hiking mountains that are higher than 3000 feet in altitude. So you create another column called “Over 3000 Feet”. An IF statement is the easiest way to fill out this field.
Here’s how an IF statement works:
IF(logical_expression, value_if_true, value_if_false)
The parameters in the IF statement work as follows: * Logical_expression: This is a conditional statement using operators like , or =.
- Value_if_true: Enter what you want in the cell if the logical expression is TRUE.
- Value_if_false: Enter what you want in the cell if the logical expression is FALSE.
In this example, start with the first row and place the cursor in cell C2. Then, type the following formula:
=IF(B2>3000,”YES”,”NO”)
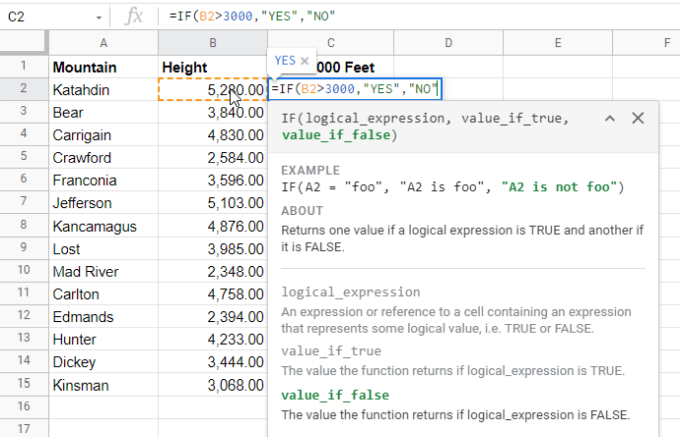
This IF statement means if the height of the mountain in cell B2 is greater than 3000, then display YES in cell C2, otherwise display NO.
Press Enter and you’ll see the correct result (YES) in cell C2.
You may also see a Google Sheets suggestion to autofill the rest of the cells below this one. Select the checkmark if you’d like to go ahead and autofill the rest of the cells with this same function. The references will automatically update to the correct cells for those mountain heights.
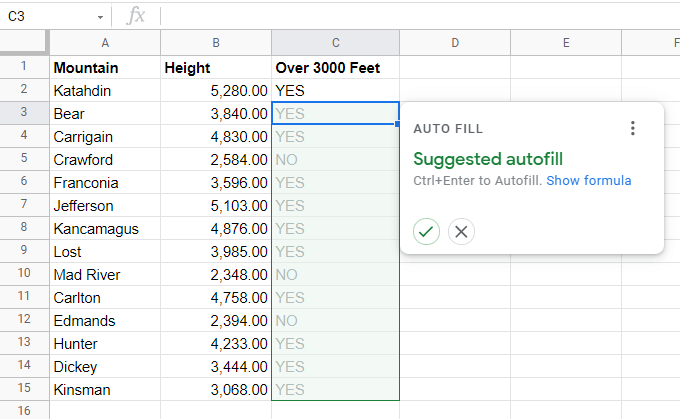
If you don’t see this suggestion, you can hold the Shift key on your keyboard and double-click the small square at the lower right corner of the cell where you entered the first formula.
Using Nested IF Statements in Google Sheets
Now let’s look at an example of creating a nested IF statement in Google Sheets.
Using the same example as above, let’s say you want to find the first mountain in the list that isn’t over 3,000 feet in altitude so you choose it as your next “easy” hike. To search from top to bottom in a column for the next item that matches a condition requires a nested IF statement.
Place the cursor in the cell where you’d like the result to go. Then, type the following formula:
=IF(B2