A few years back, you had to print out a hard copy of a document in order to sign it. Thanks to the popular PDF file format, it’s easy to digitally sign a document, re-use the signature when you need it again, scan, and share the PDF with others.
Whether you’re signing a lease, contract, or applying for a loan, we’ll show you how to sign a PDF file in Windows.

You can sign a PDF file in Windows using: * Adobe Reader for Windows
- Adobe Reader DC/Adobe Reader DC Online
- DocuSign
- Third-party online solutions
How to Sign a PDF in Adobe Reader
If you need to quickly sign a PDF file, you can do so using Adobe Reader program.
Adobe Reader is the most popular PDF reader for Windows that enables you to edit a PDF file and sign it with a certified digital signature or handwritten signature.
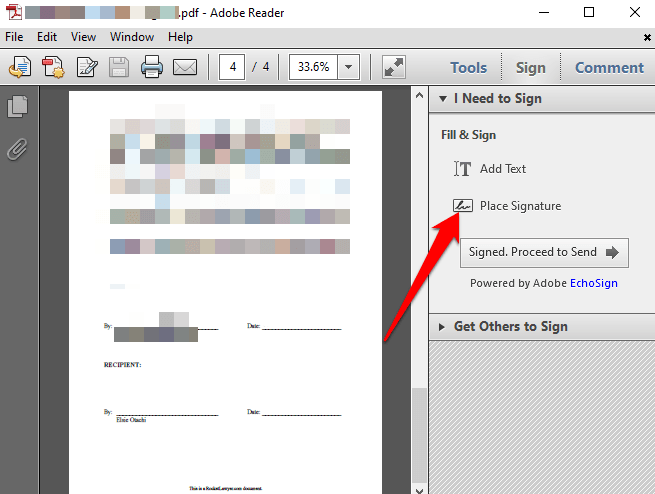
- To get started, open the PDF document you want to sign in Adobe Reader and find the Sign icon in the toolbar. Alternatively, open the signature panel by selecting View > Sign.
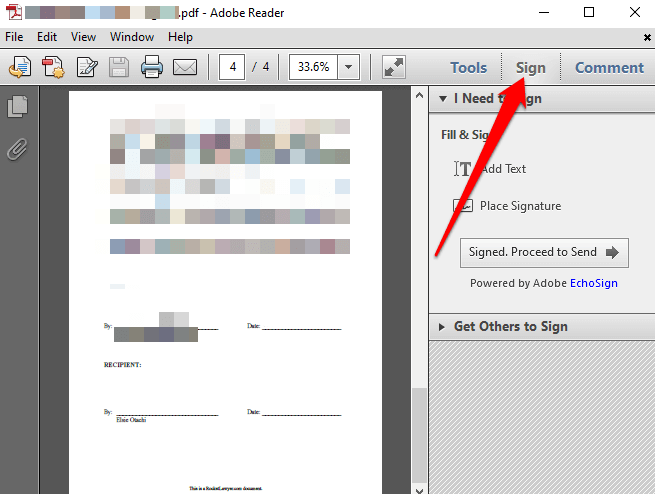
- Select **Place signature** under the **Fill & Sign** section.

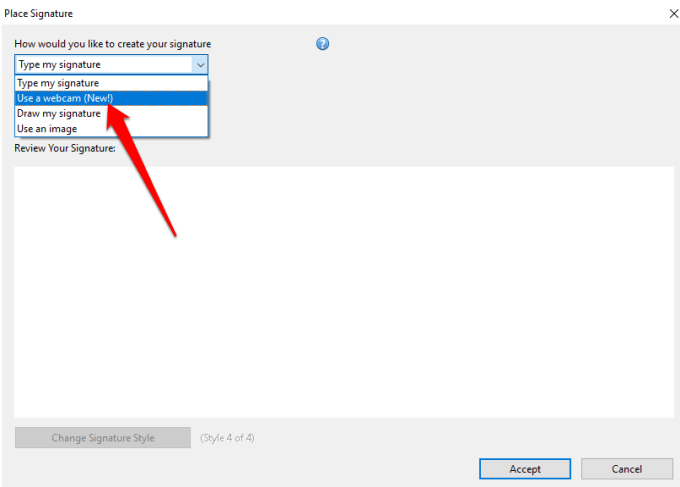
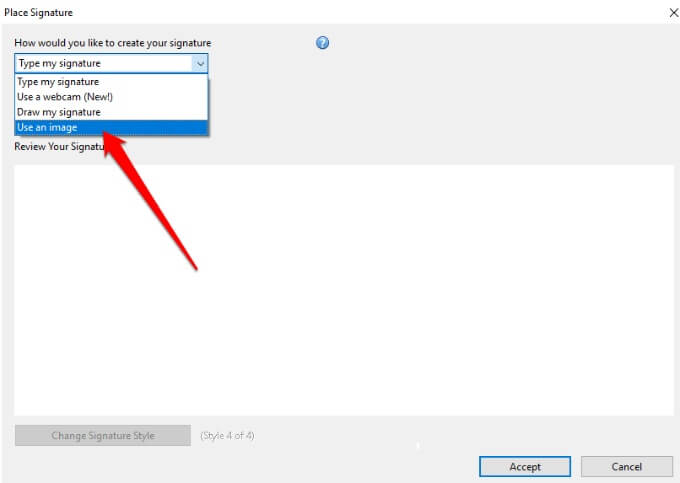
In the new window, select the drop down arrow to choose how you want to place your signature. You’ll find four options:
- Use my webcam
- Draw my signature
- Use an image
How to Sign a PDF File in Adobe Reader by Typing Your Signature
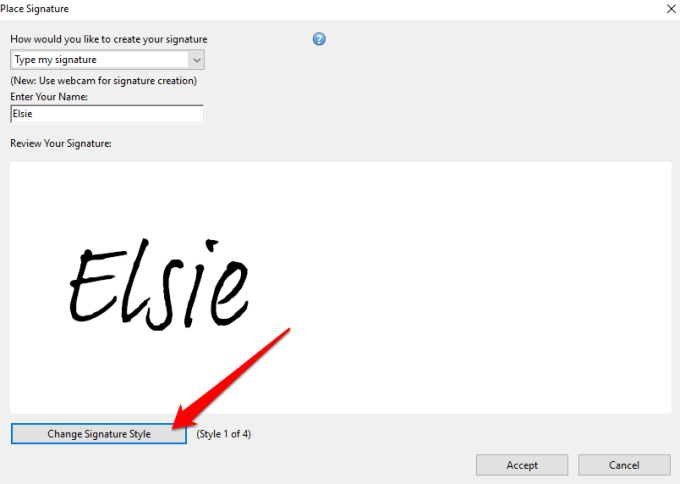
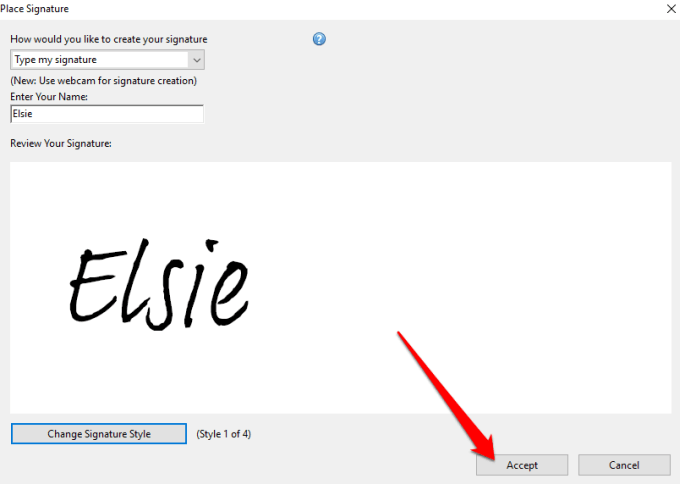
- To do this, type your name or the characters you’d like for your signature in the Enter Your Name field.
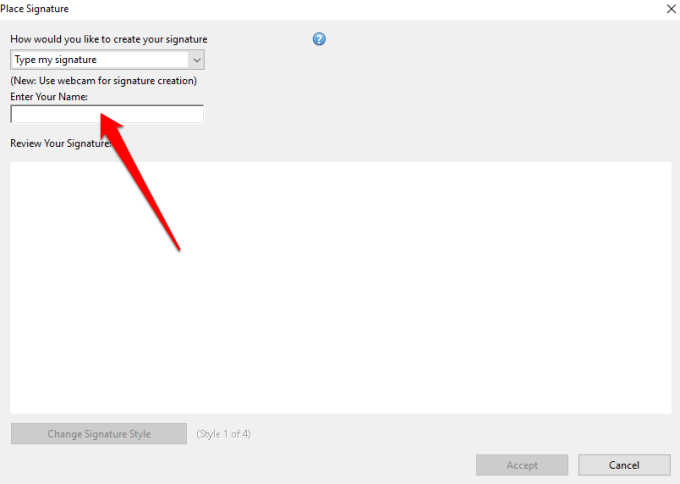
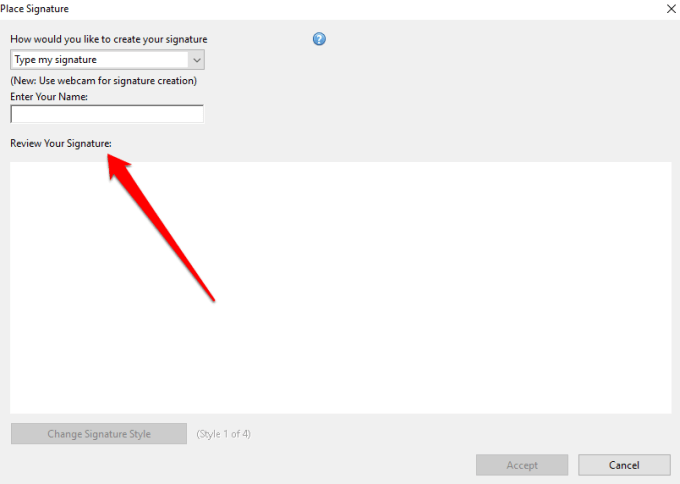
- You can preview your signature in the **Review Your Signature** box.
- If you want, you can choose from four different signature styles by selecting the **Change Signature Style** option under the **Review Your Signature** box.
- If you’re satisfied with your signature, select **Accept** to add the digital signature to your PDF document.
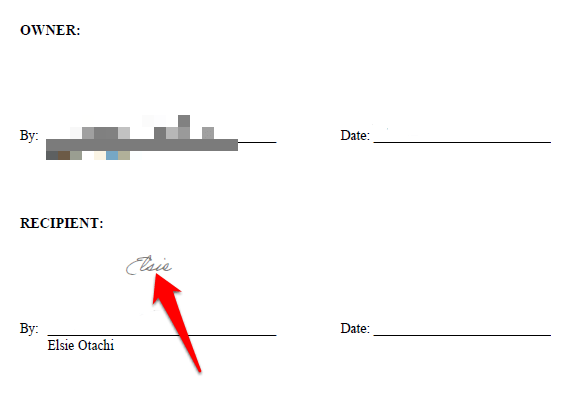
- You’ll see a small floating box with your signature inside. Drag the box to the area on the PDF file where you want to place the signature and resize the image accordingly.
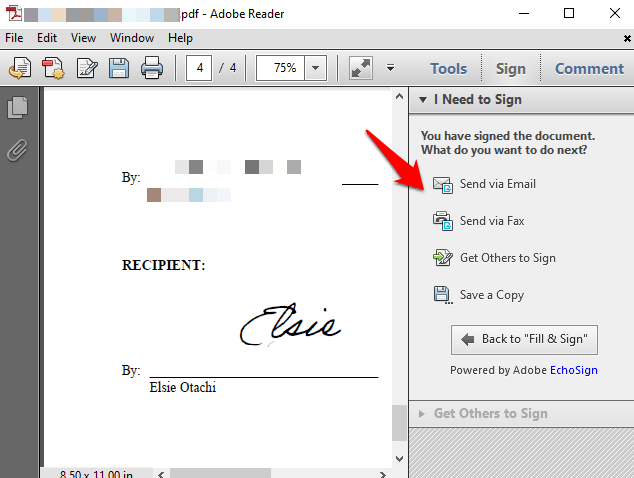
- Select **File > Save** to save your signed PDF file. If you want, you can share the signed document directly to others by selecting the **Signed. Proceed to send** option in the toolbar.
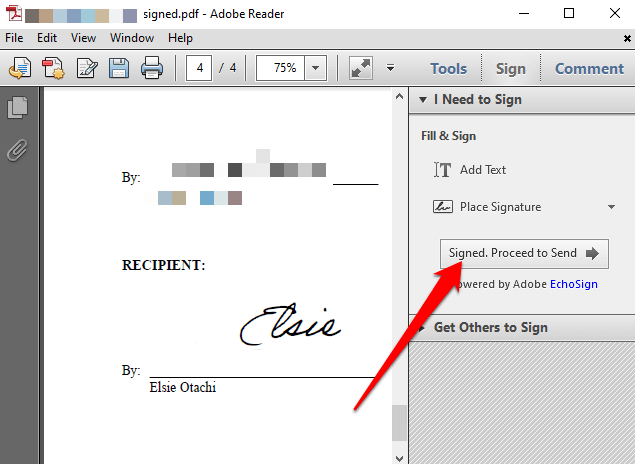
- Select whether to **share via email**,** send to fax**,** get others to sign **or** save a copy**.
**How to Sign a PDF File in Adobe Reader Using a Webcam**
You can also sign PDF files in Windows using your computer’s webcam.
- To do this, open the PDF file you’d like to sign electronically and select **Sign > Place Signature** from the **I Need to Sign** section.
- Select **Use a webcam** from the **Place Signature** dialog drop down menu.
- An instruction will appear saying: **Sign your name with black ink on white paper. Click the “Start Webcam” button to start capturing the signature image**.
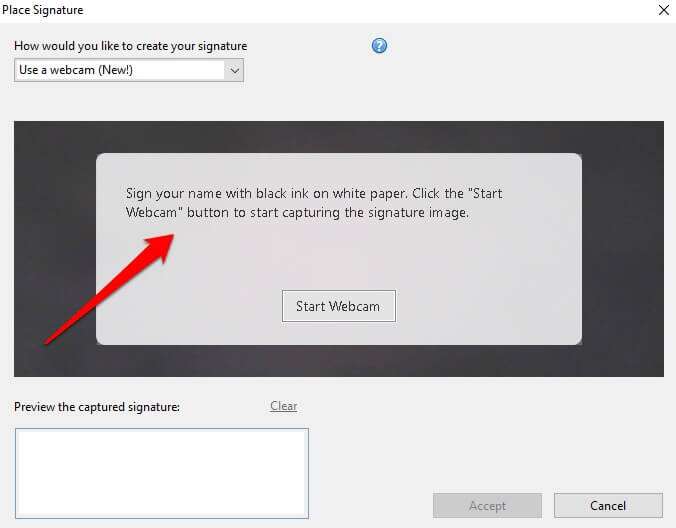
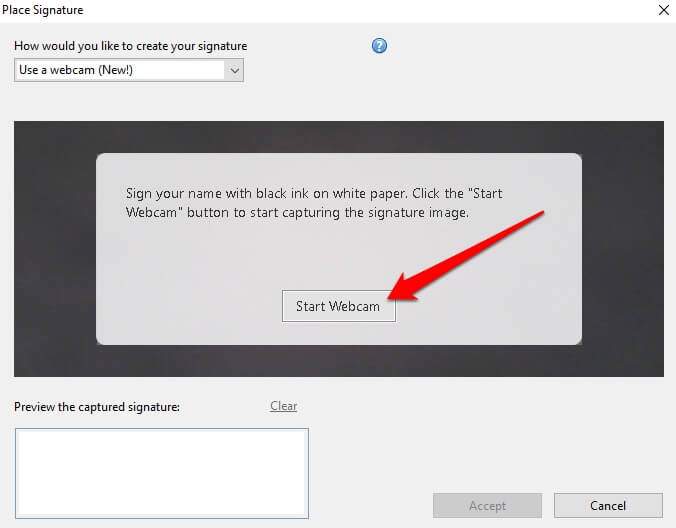
- Select **Start Webcam**.
- Align your signature so that it sits on the **blue line** on your screen.
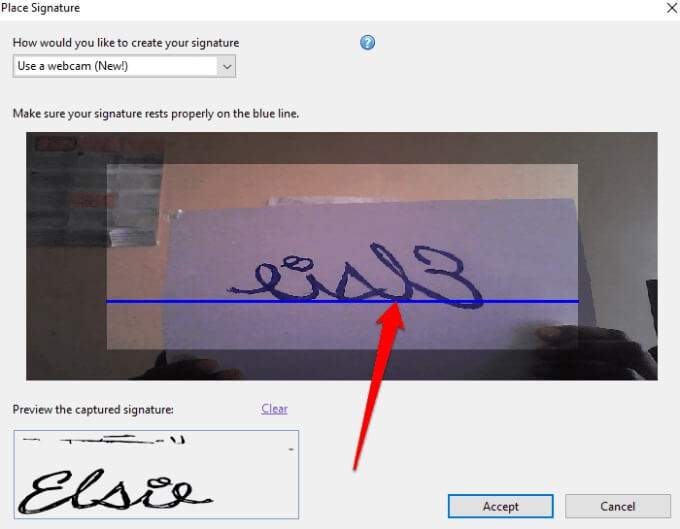
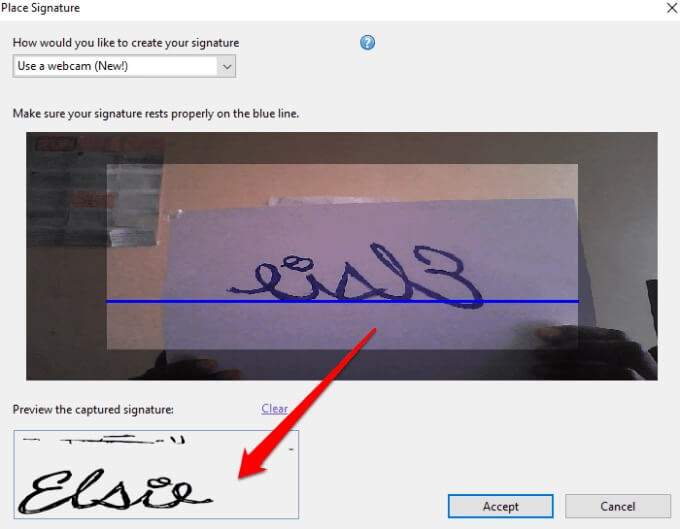
- A preview of the signature will appear in the **Preview the captured signature** box.
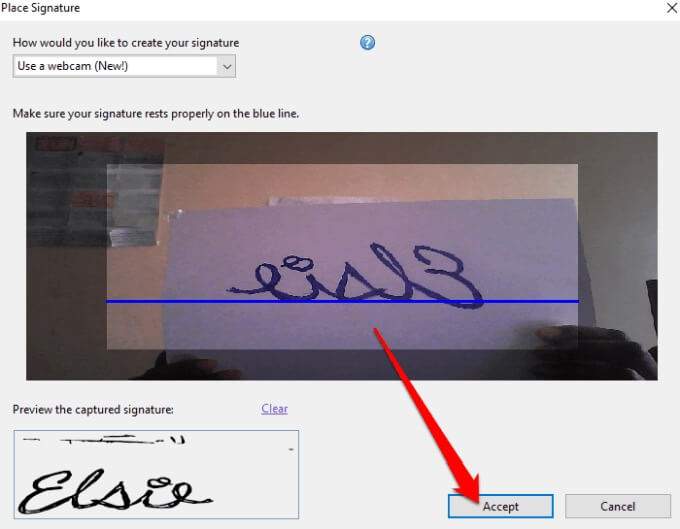
- Select **Accept**.
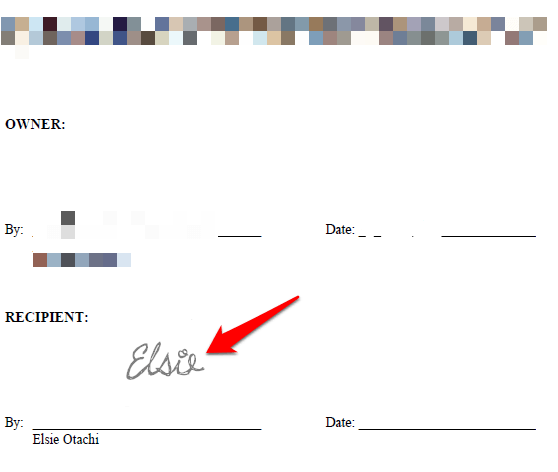
- Move your signature to where you want it placed on the document and resize it to fit.
- Save your document or select **Signed. Proceed to send** for more sharing options.
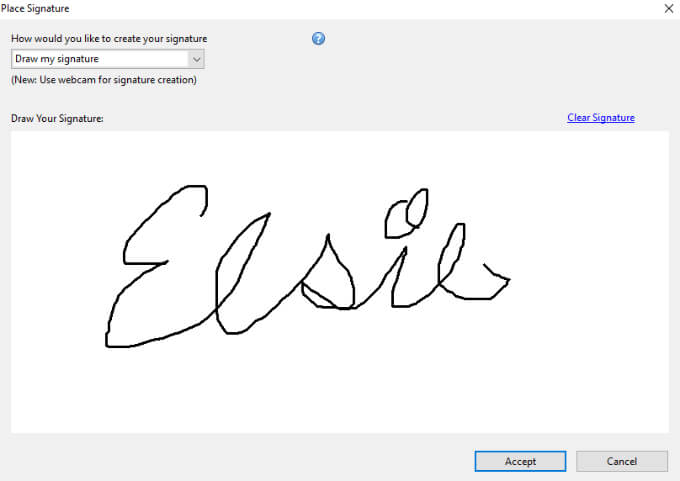
**How to Sign a PDF File in Adobe Reader by Drawing Your Signature**
Drawing your signature may not be as easy as typing your name or using your webcam to scan the signature. However, if you have a Windows PC with a touchscreen and stylus or Surface pen, you can sketch out your signature and sign the PDF document.
- To do this, open the PDF document, select Sign > Place Signature from the I Need to Sign section.
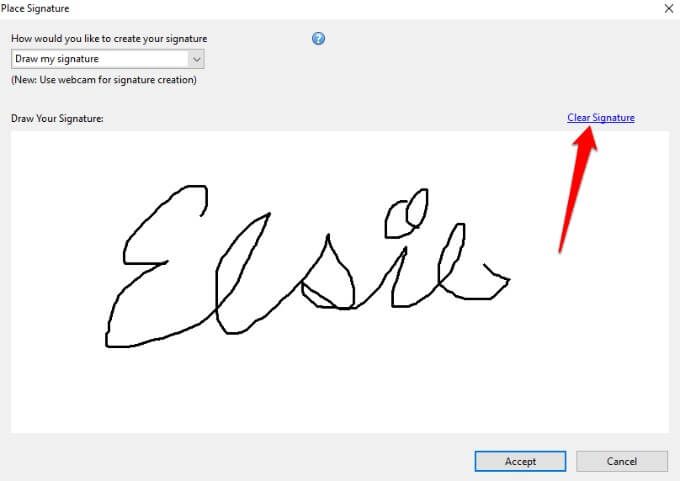
- Select Draw my signature from the Place Signature dialog drop down menu.

- Next, draw your signature in the empty box provided.
- If you make a mistake while drawing, use the **Clear Signature** link to erase what you’ve drawn and start over.
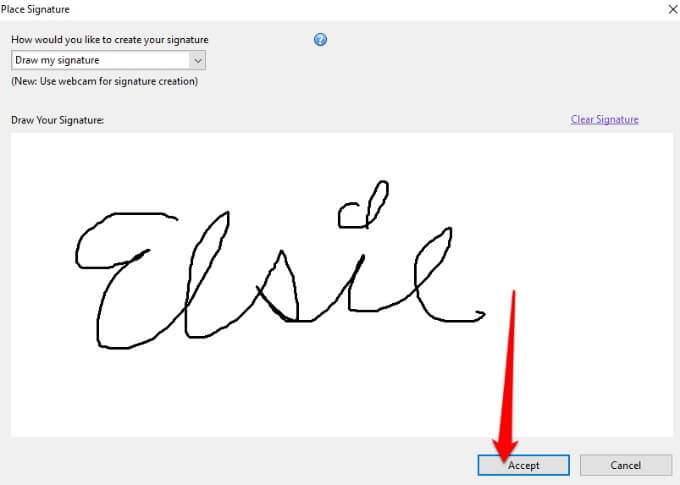
- Select **Accept**. Place the signature on the section you want to sign on your document, and save the document.
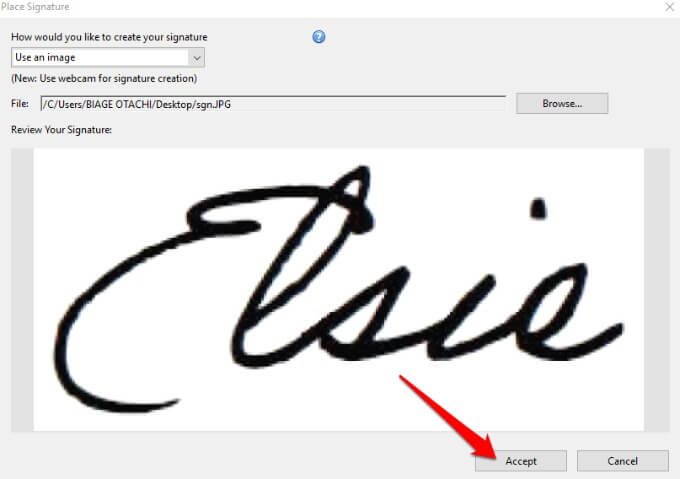
**How to Sign a PDF File in Adobe Reader Using an Image**
If you have your signature in image format (JPEG or PNG), you can use it to sign a PDF file in Windows.
- To do this, open the PDF in Adobe Reader, select Sign > Place Signature. In the new window, select Use an Image from the drop down menu.
- Next, select **Browse** to open the image file containing your signature.

- Resize the image, select **Accept** to place it on your PDF document, and save the file.
**How to Sign a PDF in Adobe Acrobat DC Reader **
If you have the full version of Adobe Acrobat Reader DC, you can use it to sign a PDF file in Windows. However, the program is also available for free online and you can still sign your PDF file with it.
- Download and install the Windows version of Adobe Acrobat Reader DC to your PC.

- Open Adobe Acrobat Reader DC, select **File > Open** to open the PDF file you want to sign, and then select **Sign > Add Signature**.
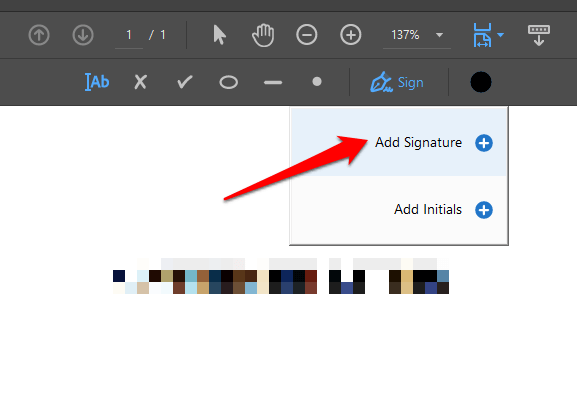
- In the new window, add your custom signature, change the style if you want, and then select **Apply**.

- Drag the small box with your signature to the section of the PDF file where you’d like to place your signature, and then save your document.
**How to Sign a PDF File Using Adobe Acrobat Reader Online**
If you don’t want to download the free version of Adobe Acrobat Reader DC, you can use the free online tool to sign a PDF file in Windows.
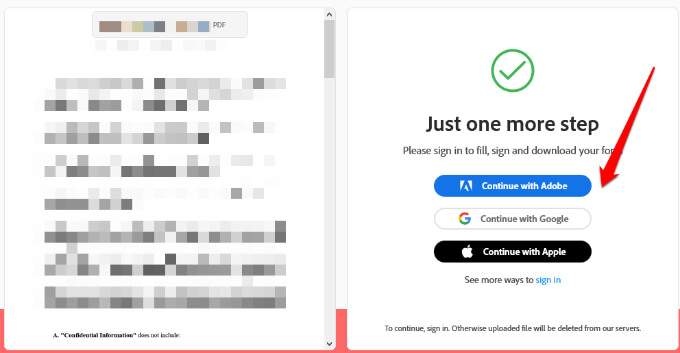
- To do this, go to Adobe Acrobat online and click Select a File to upload the PDF document you want to sign. You can also drag and drop the file to upload it.

- Sign in with your Adobe, Google, or Apple account to continue and complete the fillable form.
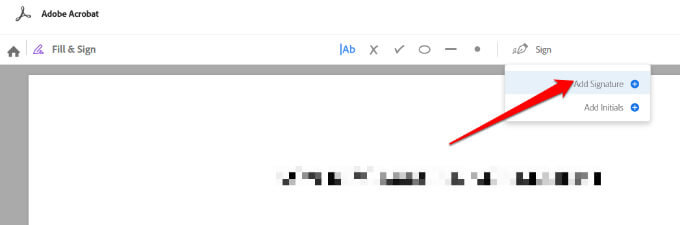
- Select **Sign **to add your signature.
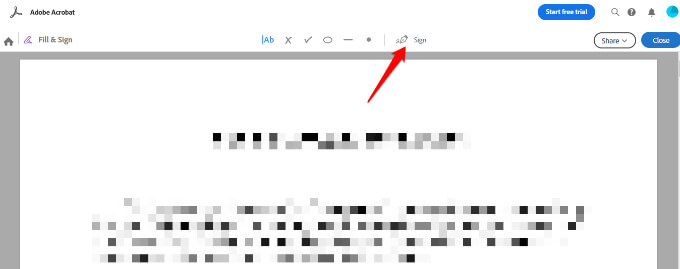
- Next, select **Add Signature**.
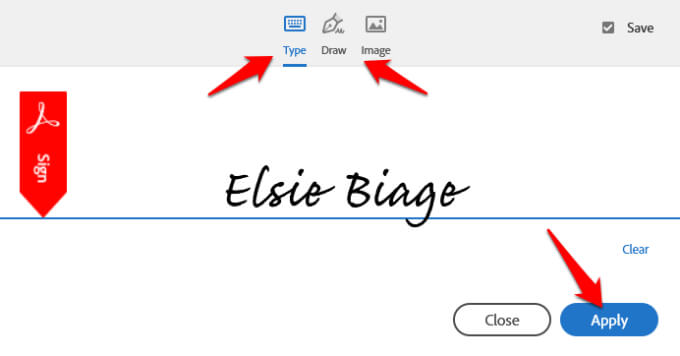
- You can choose to **Type**,** Draw**, or upload your signature as an **Image**, and then select **Apply**.
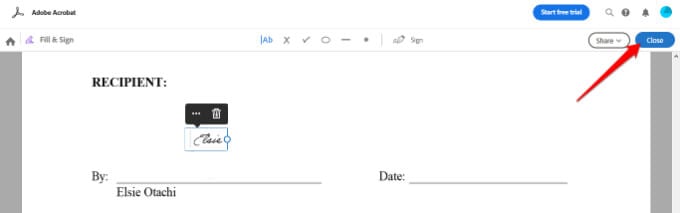
- Drag the signature to where you want it to go and then select **Close**.
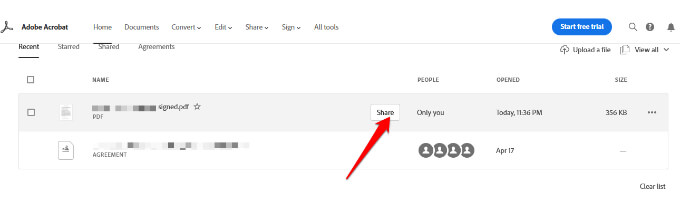
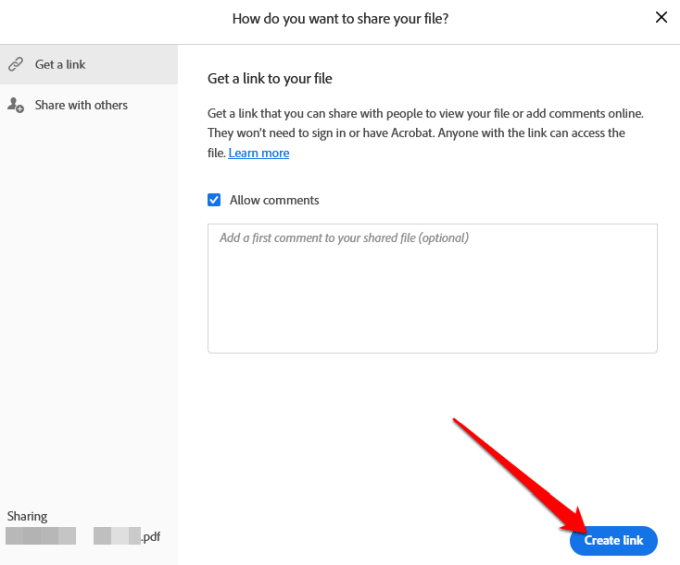
- If you want to share your file, select **Share **next to the file name in Adobe Acrobat Reader Online.
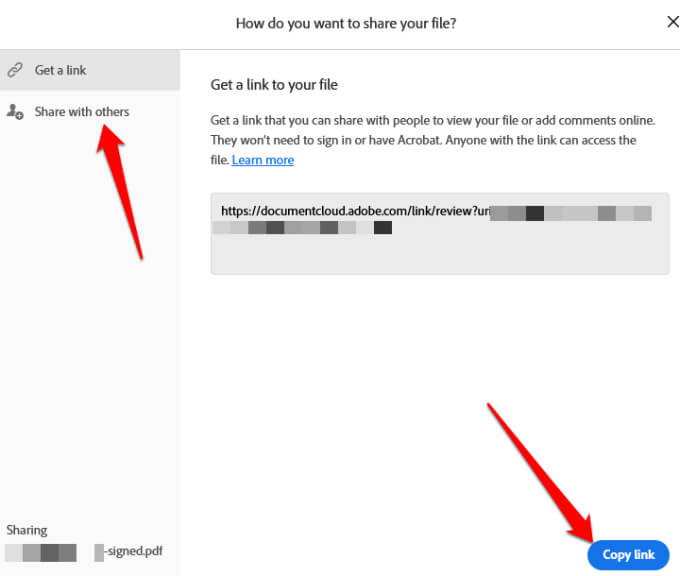
- Next, select how you want to share your file, and select **Create link** to get a shareable link.
- Copy the shareable link and select **Share with others** to send and notify your recipients via email.
- Select **Next**, then download your signed document or get a link to share it online.
**How to Sign a PDF File Using DocuSign**
DocuSign is an eSignature provider that lets you easily add a digital or electronic signature to PDF, Word, or image files.
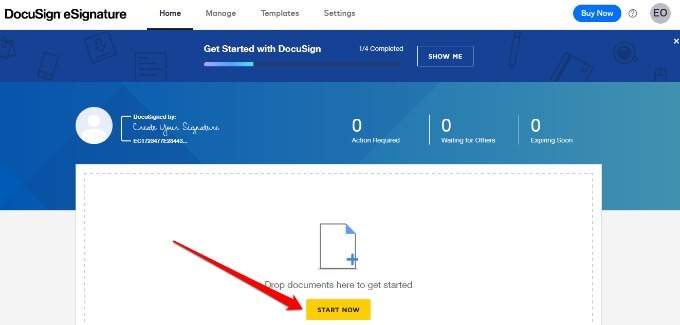
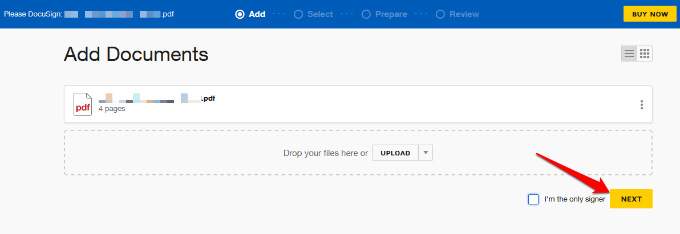
- To sign a PDF file using DocuSign, you need to sign up to use the service. Create an account by going to DocuSign. Once you’re signed in, drag and drop the PDF file you want to sign and select Start Now.
- If you’re the only one signing the PDF file, check the **I’m the only signer** box and select **Sign**.
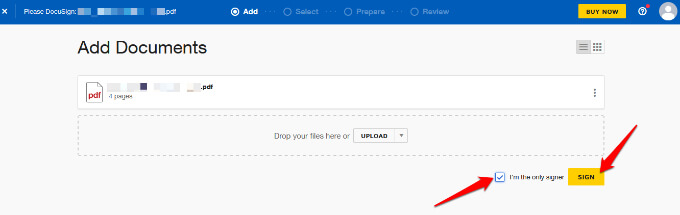
- If you’re not the only one signing the PDF, leave the box unchecked and select **Next**.
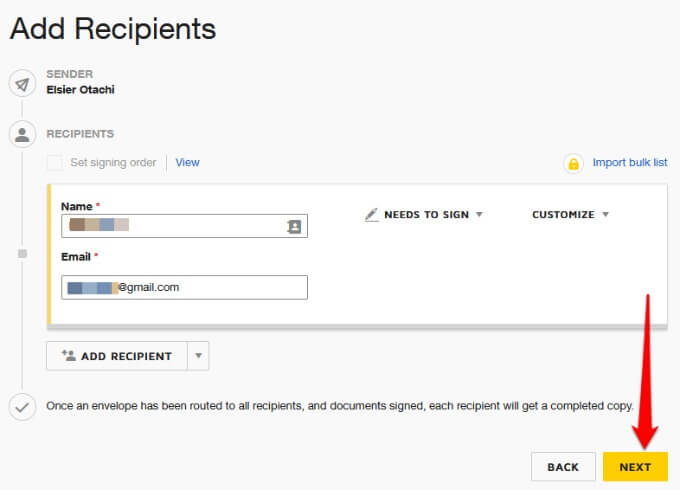
- Enter the name and email address of the recipient you want to sign the document. If they’re already in your contacts list, their emails will appear as you start typing in the email field.
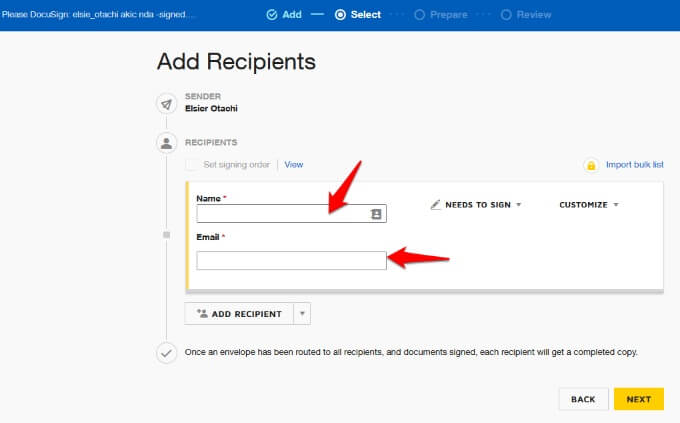
- If more than one recipient is required to sign the document, select **Add Recipient**.

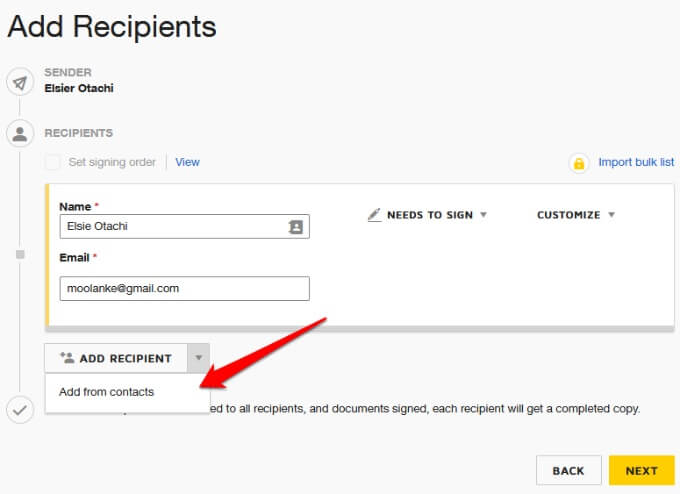
- If they’re on your contacts list, select the drop down arrow next to Add Recipient, and then select **Add from Contacts**.
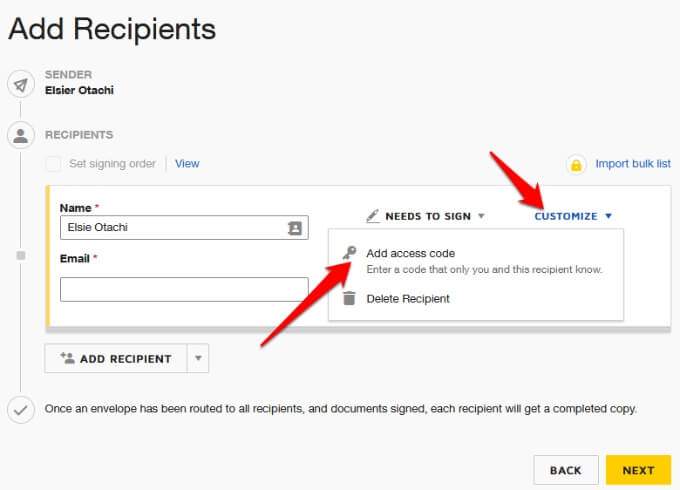
- You can also choose whether the recipient(s) **needs to sign, **is an** in-person signer, will receive a copy of the signed PDF, **or** needs to view**.

- If you want only your recipient (s) to access the PDF file for signing, select **Customize > Add access code**.
- Select **Next**.
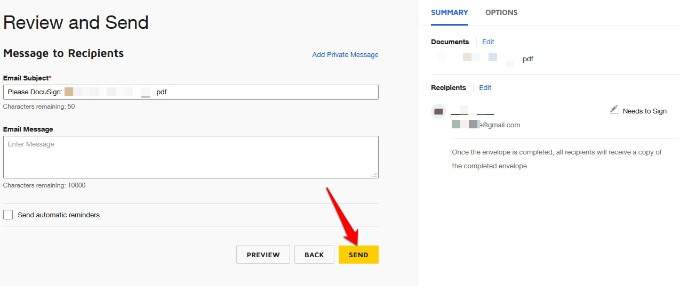
Note: Once all recipients get the PDF document and they all sign it, each recipient will receive a completed copy via email.
- Add the required fields to the PDF document such as **Signature, Date, Name, Title, Company **and so on. When the recipients get the document, they’ll simply click on each of the required fields and enter the required details before sending back the signed copy.

- Select **Next**, preview your document, and select **Send**.
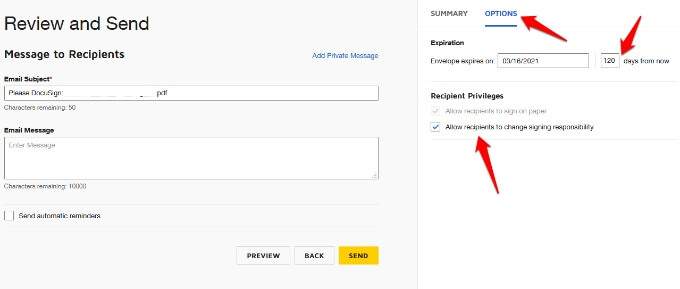
Note: You can set an expiration date for the PDF document under Options in the Review and Send section. Plus, you can select Recipient Privileges such as whether they can sign on paper or change signing responsibility.
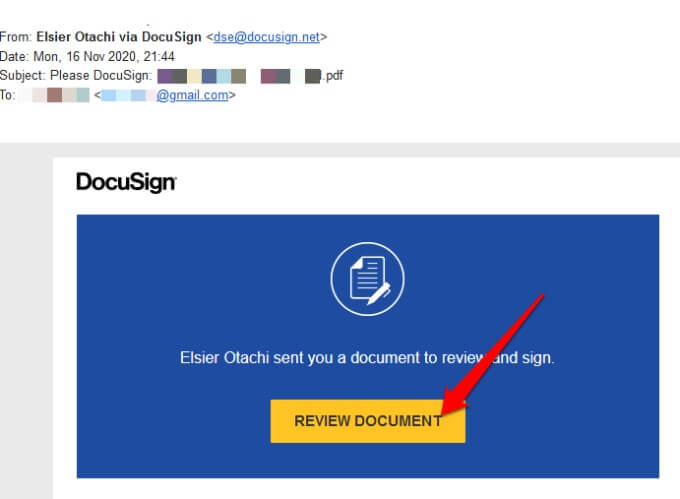
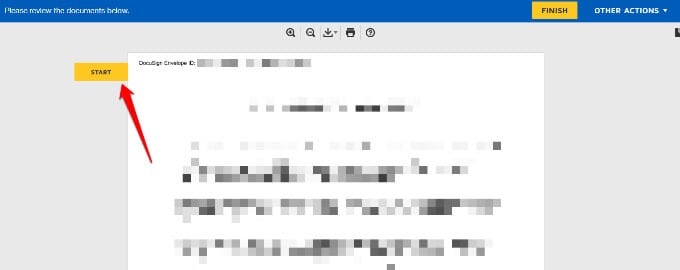
- If you received an email with a PDF file via DocuSign, and it requires your signature, open the email and select **Review Document**.
- Select **Start**, and you’ll be directed straight to where you need to sign or place your signature.
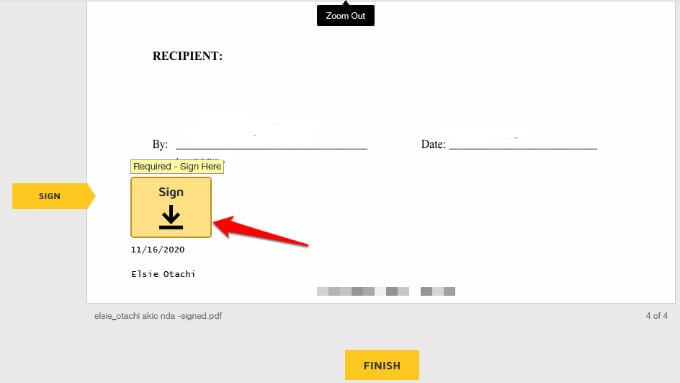
- Tap the **Sign Here** icon.
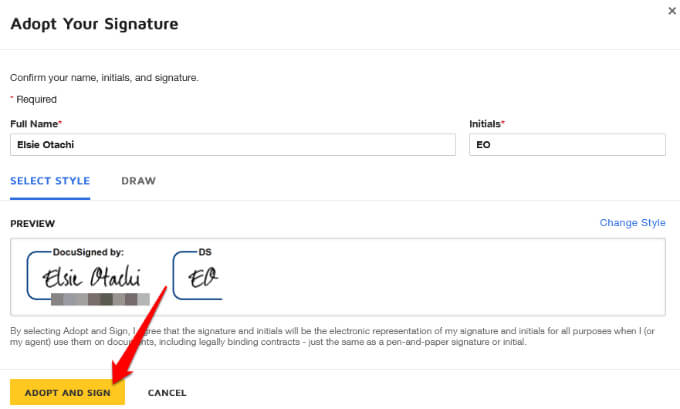
- Select a style for your signature or draw it.
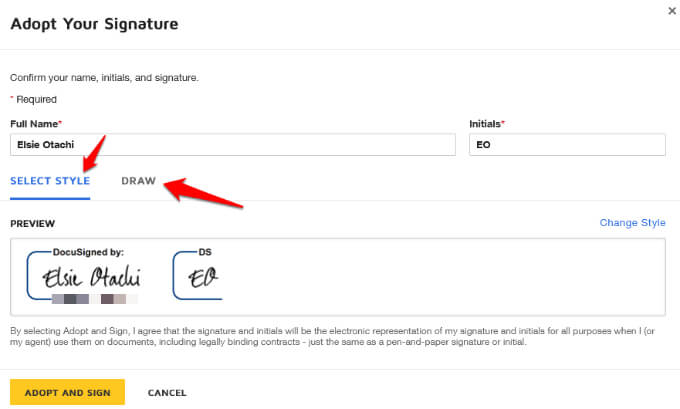
- If you want to change the font style or how your signature should appear, select **Change Style**.
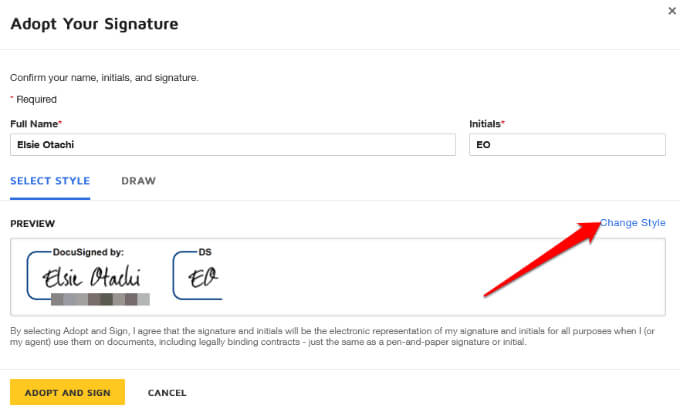
- Choose your preferred style from the available options and then select **Adopt and Sign**.
- The signature will appear on the document. Select **Finish** to complete the signing process.
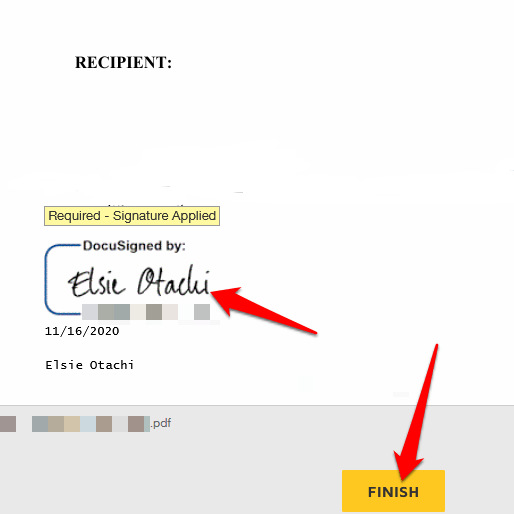
The owner of the document will receive an email notification that you’ve completed signing the document. Once every other recipient has signed, each one will receive a copy of the signed document.
Sign a PDF File Using Online Solutions
If signing a PDF file in Windows using Adobe Reader or DocuSign sounds complicated, there are several online solutions you can use to electronically or digitally sign PDFs.
Some of the popular tools include SmallPDF, Nitro Pro, or Foxit Reader. Each of these tools has features that allow you to create, edit, convert, sign, and even export your PDF file without effort.
Quickly Sign a PDF on Your PC
Signing a PDF in Windows can be a hassle, but with the instructions in this guide, you should be able to do it easily and save or share the document with others. Have you tried any of the methods listed here to sign a PDF file in Windows? Share your experience with us in the comments.