Do you see an Activate Windows Watermark in the lower right corner of your Windows 10 desktop? This notification means that you haven’t activated Windows properly. While some people disregard the notification, you might be one of the few who wants to know how to remove the Activate Windows 10 Watermark on yourPC.
If you find the watermark as more than a minor annoyance, below are some steps you can take to remove it.
**Remove the Activate Windows 10 Watermark on Your Desktop**
If you have a Windows license, you can go to Settings and activate your Windows PC with the license. But if you don’t have a license, then there is a way to remove this watermark by changing the configuration from the Registry Editor.
- * Open the Registry Editor by pressing Windows + R on your keyboard. This action will open the Run window.
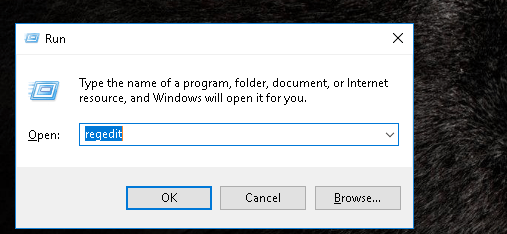
- Next, type the phrase **“regedit”** (without the quotation marks; use this format for similar commands). Then, select **OK**. A window asking, “Do you want to allow this app to make changes to your device?” will appear. Click, Yes. * After the Registry Editor window opens, click the **HKEY_LOCAL_MACHINE** folder. Doing so will open a list of subfolders. * Next, click the **SYSTEM** folder, which will open a new list of subfolders. Next, click the **CurrentControlSet** folder, then click on the **Services** folder. It will take you to a long list of subfolders. * Then, scroll down until you have located the **svsvc** subfolder. * Check the folder address that is currently opened. It should look like this:
Computer\HKEY_LOCAL_MACHINE\SYSTEM\CurrentControlSet\Services\svsvc
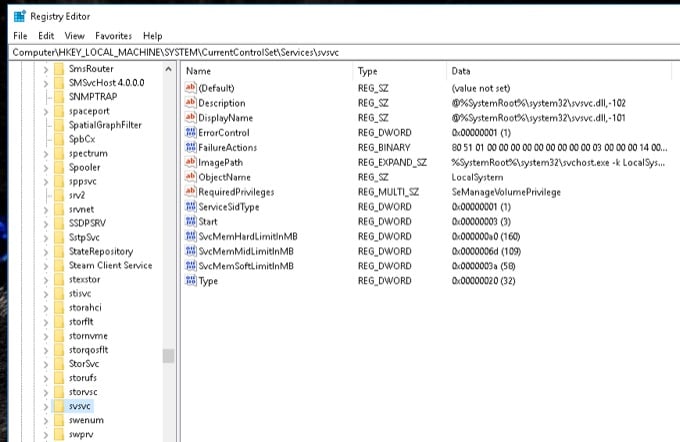
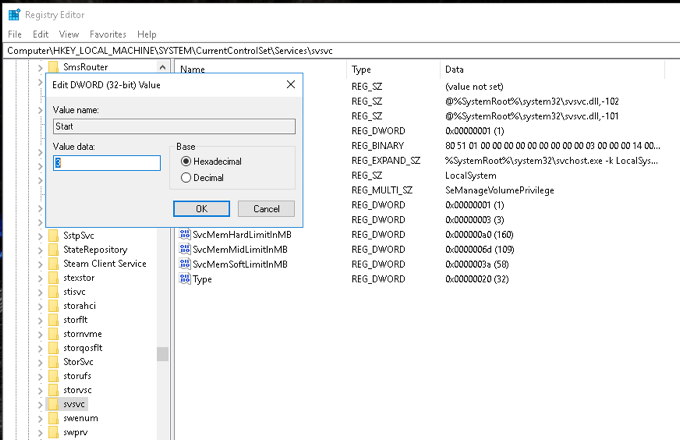
- Once you’ve confirmed it’s the right address, right-click on the **Start** entry in the right hand pane. Then, choose **Modify**. * Next, change the Value Data from 3 to **4**. Select **OK** and finally restart your computer.
After rebooting your PC, the Activate Windows 10 Watermark should be gone.
**Getting Rid of the Activate Windows 10 Watermark Using CMD**
- Hit the **Windows + R** buttons on your keyboard to open the Run window. Type **“regedit”** before selecting **OK**. * Once again, a notification asking, “Do you want to allow this app to make changes to your device?” will come out. Select **Yes**. * In the Registry Editor Window, type in this address on the upper area: **Computer/HKEV_CURRENT_USER\Control Panel\Desktop**.
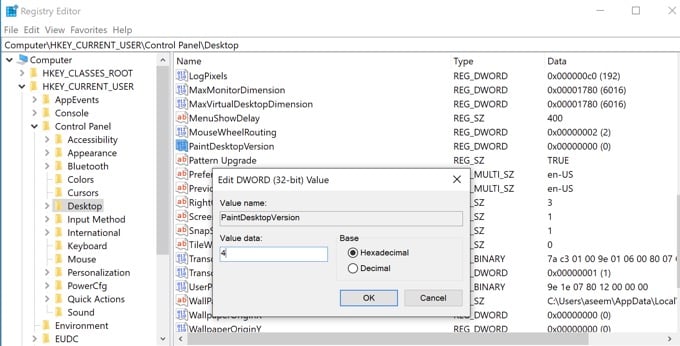
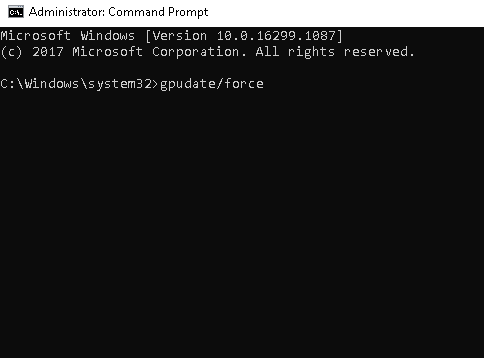
- On the right side of the newly opened Window, locate **PaintDesktopVersion**. Double click it and change the Value Data to **4**. Minimize this window for a while. * For the next phase, go to the Start Menu and type **CMD** on the search bar. Click on the first item under the **Best Match** dialogue to open Command Prompt. Make sure that before you open it, choose the Run as Administrator option. * There will be a notification that asks, “Do you want to allow this app to make changes to your device?” Select **Yes**. * On the Administrator Command Prompt, type **“gpudate /force”** and hit Enter. Then, minimize this Window for a while, but we will come back to it later.
- Next, go back to the **Registry Editor Window** and enter this on the address bar:
Computer\HKEY\LOCAL\MACHINE\SYSTEM\CurrentControlSet\Services\svsvc
- On the right side of the new page, select Start. Next, change the Value Data to 4 before selecting OK.
- Right-click on a space on the right side of the Window and select New. Then, select Key. On the left side, you will see that a folder New Key #1 is selected. Change its name to KMS.

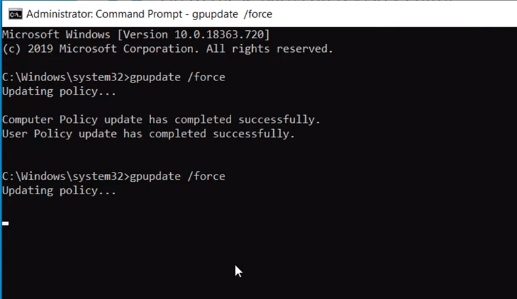
- Next, double-click on the Default icon on the right side of the Window. Next, change the Value to **“kms_4”**. Select **OK** and minimize this Window again. * Go back to your Command Prompt Window, run the command **“gpudate /force”,** and press Enter. This action will update your Computer Policy. Minimize this window for now.
- Next, head to the **Settings** option in your Start Menu. At the bottom of the page, you will notice a notification that reads, “Windows isn’t activated. Activate Windows now.” Click on it. * On the newly opened page, you can see a red text that says, “Windows reported no product key was found on your device.” To address this issue, take note of the Operating System Edition of your PC. Then, head to this link: https://docs.microsoft.com/en-us/windows-server/get-started/kmsclientkeys. * You can see all the keys on the Microsoft page that you will need to activate your Windows version. Scroll down until you see the Edition that matches the one that is on your PC.
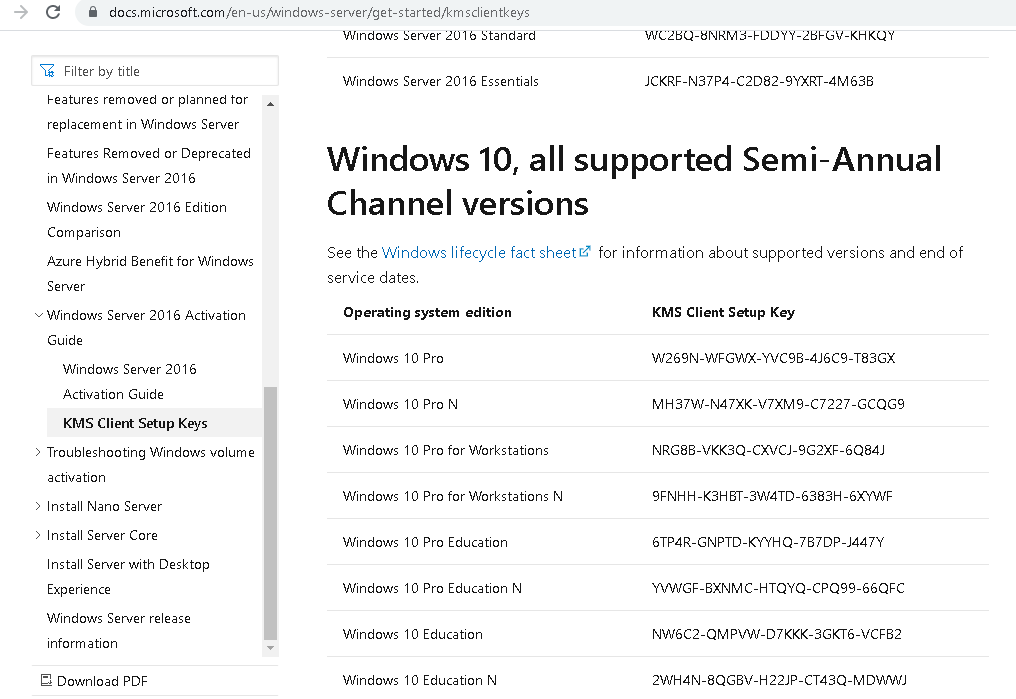
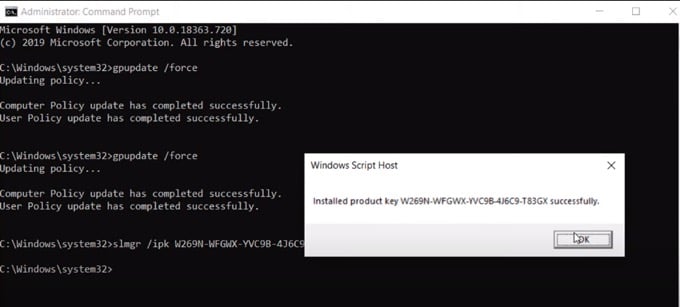
- Highlight the entire key string and Copy it. Minimize your browser. Next, open the Command Prompt again. This time type in **“slmgr /ipk”**. Next, add a space and paste the key string from Microsoft’s website. Once a notification pops out, click OK. * Then, type in **“slmgr /skms kms8.msguides.com”**. Type **“slmgr /ato”** on the following line and hit Enter.
- Next, go back to the **Settings Window **and check if the Activation was successful. If you don’t see the red text anymore, then the method worked. * Open your **Registry Editor** once more and change the address to **Computer\HKEY_CURRENT_USER\Control Panel\Desktop**. On the right side, locate the PaintDesktopVersion icon, double click it and change the Value Data from 4 to 0.
- Finally, head over to your **Administration Command Prompt** and type in **“gpupdate /force”**. This action will again Update your Computer Policy. Close all of the opened Windows. Right-click on your Desktop and hit Refresh. You should notice that the Windows 10 Watermark was removed.
Take note that this solution only removes the Windows Activation watermark. Recent updates by Windows might prevent it from attaining certain functionalities of a genuine Product Licensed Key. As such, you might not unlock certain features of your PC, such as Customization of Taskbar, Desktop Background, and more.
Best Way to Clear Out the Activate Windows Watermark
While the method discussed in this article addresses the main issue at hand, it is not the best way to remove the watermark. The solution we’ve presented is just a workaround that isn’t update-proof in any way.
Suppose you want to banish the Activate Windows Watermark permanently. In that case, we highly recommend that you activate the OS by purchasing a Licensed Product Key from Microsoft or any of their trusted retailers.