Not every video requires sound, especially if the audio quality is poor. Loud background noises, unnecessary chatting, bad language—they can all reduce the quality of an otherwise perfect video, especially home videos. The best way to deal with this problem is to remove the audio entirely, leaving the video to speak for itself.
If you have iMovie installed on Mac, you can use it to quickly scrub the audio track, or use the cross-platform VLC to remove the audio instead. Alternatively, you could use online web services to remove the audio track for you. If you want to know how to remove audio from video on Windows or Mac, here’s what you’ll need to do.

**How to Remove Audio From Video on Mac Using iMovie**
If you’re trying to remove audio from video on a Mac, the best way to do it is to use the included iMovie app. iMovie is available for free for all Apple product owners and should be installed automatically on your Mac or MacBook. If it isn’t, you can download it for free from the App Store.
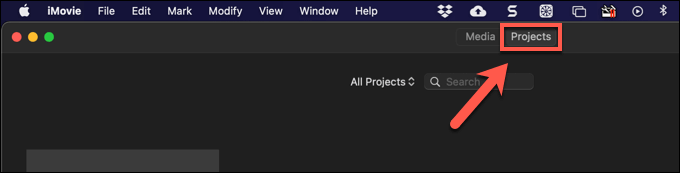
- To start, open the iMovie app on your Mac, then select the Projects tab at the top.
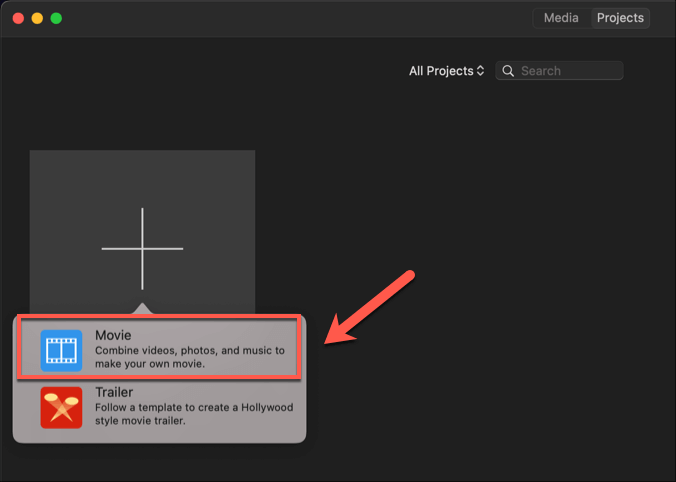
- In the **Projects** tab, select the **Create New** option to create a new video editing project. From the pop-up menu, select **Movie**.
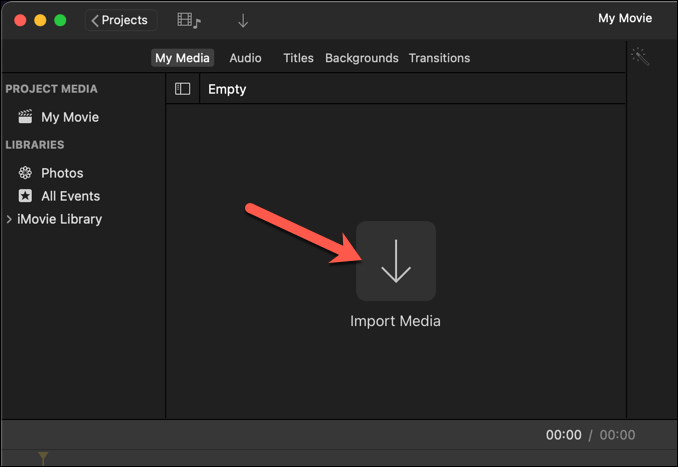
- In the **My Movie** project window, select the **Import Media** option to load the video containing the audio you wish to remove. In the **Finder** window that opens, find and select the file to insert it.
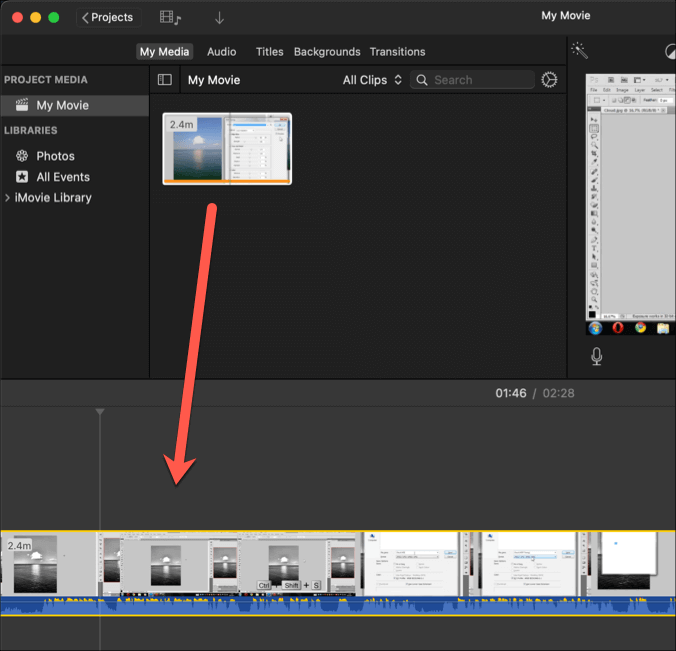
- The **My Movie** project window will update to display your video. Using your mouse, drag the video file to the timeline area at the bottom of the window.
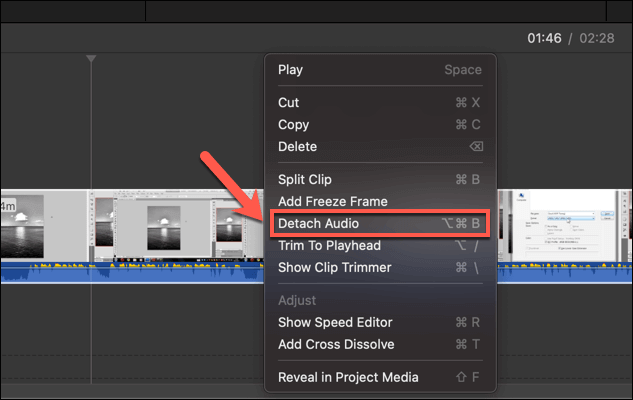
- With the video loaded into the iMovie timeline, right-click the timeline. From the menu, select the **Detach Audio** option.
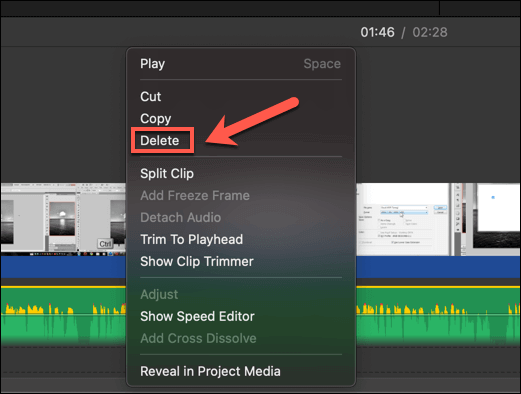
- The timeline area will update, showing the audio track as a separate timeline beneath the video timeline, highlighted in green. To delete the audio, right-click the green audio track in the timeline area, then select the **Delete** option.
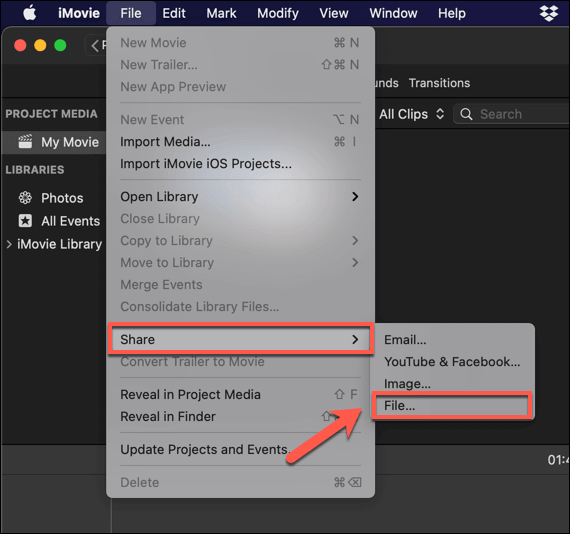
- With the audio removed, you’ll need to save the video. To do this, select **File **>** Share **>** File **from the menu bar.
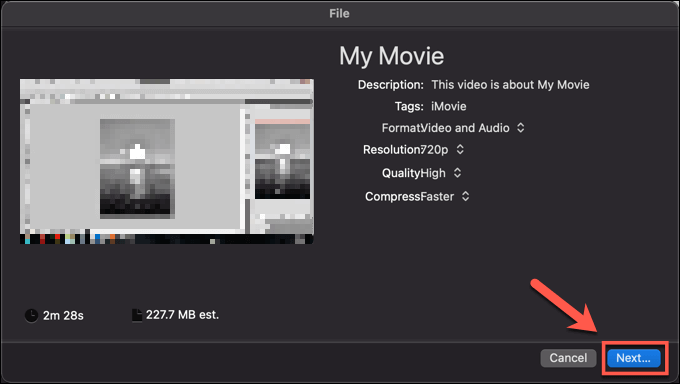
- In the **File **menu box, you can change other video settings, such as video resolution and quality. Select the **Next** option to continue once you’re ready.
- You’ll need to provide a new filename for your audioless video file, as well as a suitable save location. Provide these, then select **Save **to save your file.

At this point, the video (with audio removed) will appear in the save location you selected. You can play the video to determine that sound has been removed, export it to another platform to share it, or transfer it to another video editor for further edits.
How to Remove Audio From Video on Windows or Mac Using VLC
If you’re looking to remove audio from a video on a Windows PC, or if you’re using a Mac and don’t want the huge iMovie app taking up space, then VLC Media Player is your best, free option. VLC isn’t a video editor, but it does offer some basic video conversion tools that allow you to quickly remove the audio track from a video.
On Windows
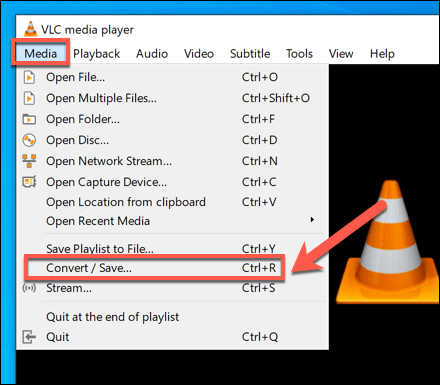
- To do this on Windows, you’ll need to first download and install VLC. Once installed, begin the removal by selecting Media > Convert/Save from the menu.
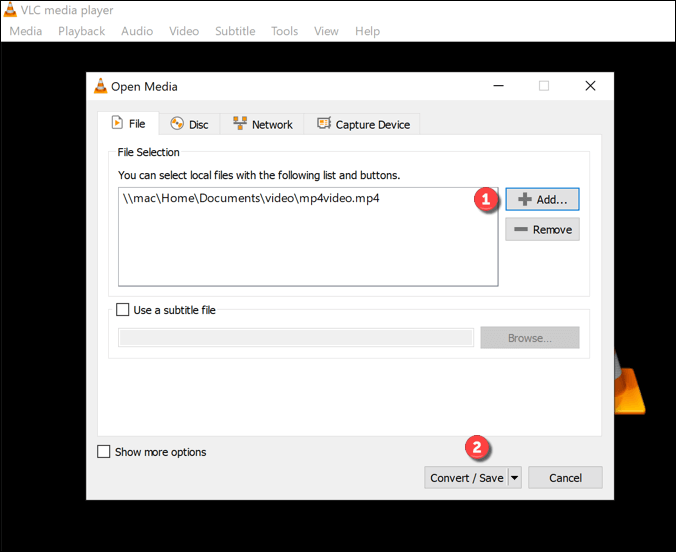
- In the **Open Media** window, select **Add** to add the video containing the audio you wish to remove. Once added, select the **Convert/Save** option.
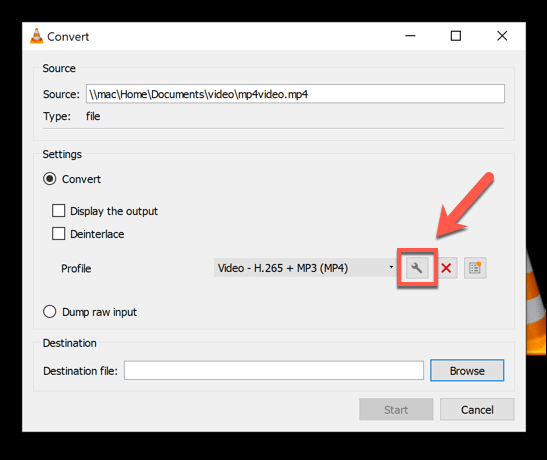
- In the **Convert** window, you can make changes to your video output file. Select the **settings icon **in the **Profile** section to begin removing the audio track.
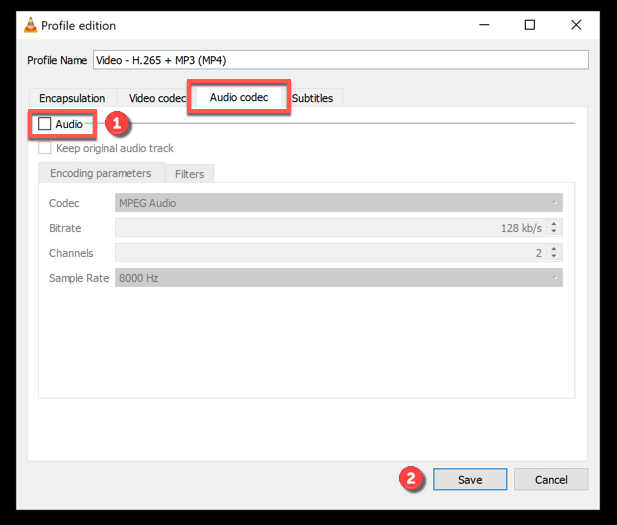
- In the **Profile edition** window, select the **Audio codec** tab. From there, uncheck the **Audio** checkbox. This will remove all audio from your video. Select the **Save** option to confirm.
- With the audio track removed, you’ll return to the **Convert** window. Confirm where you’d like to save the audioless video file and give it a new file name by selecting the **Browse** option in the **Destination **section. Once you’ve done this, press **Start** to begin the conversion process.

Once saved, the new video file (without audio) will be available in your chosen save location.
On Mac
The steps for removing audio from video are slightly different using VLC on Mac.
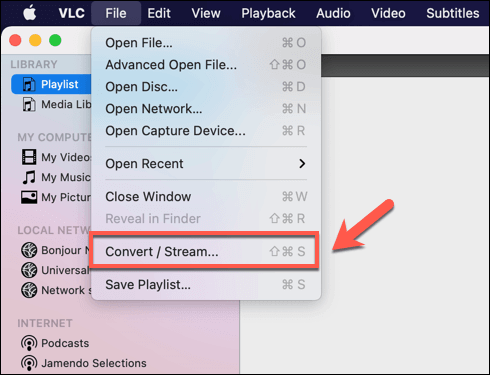
- To start, download and install VLC for Mac. Open VLC is installed and opened, select File >** Convert/Stream** from the menu bar.
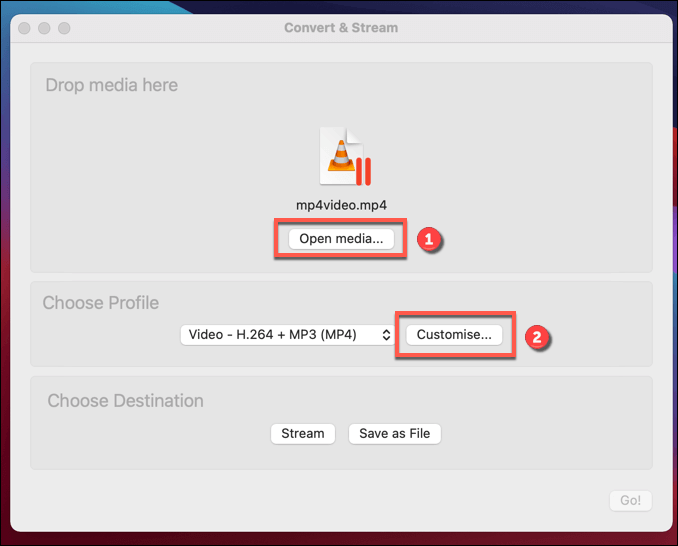
- In the **Convert & Stream **window, insert your video file by selecting **Open Media**. Once the file is inserted, select **Customize** to begin removing the audio track.
- In the pop-up window, select **Audio Codec**, then uncheck the **Audio **option to remove the audio track. Select **Apply **to apply the new settings.

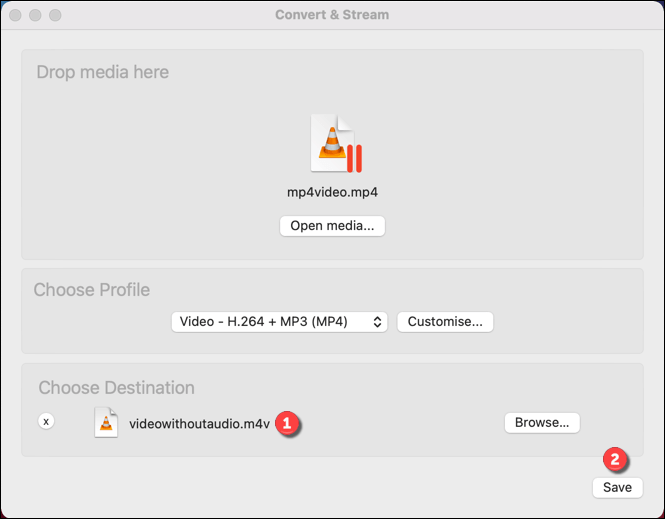
- With the audio track removed, select **Save as File** to confirm the new filename and save location for the final, audioless video file. Once confirmed, select **Save** to begin the save process.
VLC will convert the file at this point, removing the audio track and leaving the video intact. If you select any other video conversion settings (such as changing the video file type), these will be applied at this point.
The source video file will remain intact, allowing you to make further changes and repeat the process, if desired.
Using Online Services to Remove Audio From Video
If you’re looking to remove audio from video without installing new software, you could use various online services to do it for you. However, a word of warning—doing this will involve uploading your video to a remote server, where a script will run to remove the audio from your video automatically.
There are some privacy implications that you should consider before doing this. While online video editing sites shouldn’t hold on to your video, it isn’t guaranteed. You should only use online services for audio removal for videos that don’t contain personal information, or for videos that you’d otherwise be happy to share.
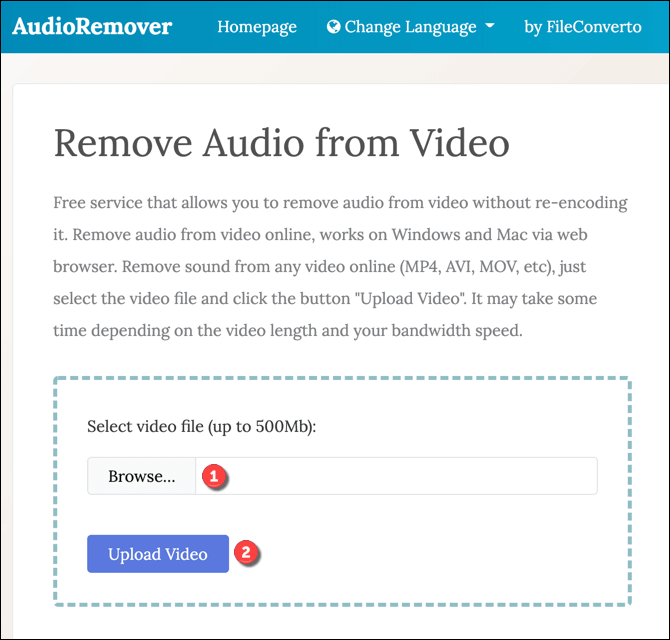
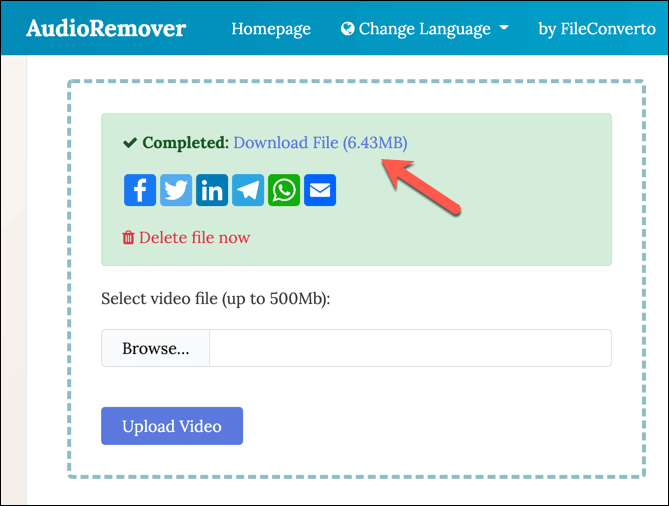
- While various online services exist for this purpose, one of the quickest and easiest to use is AudioRemover. Open the AudioRemover website and select Browse to select your video file. Once selected, select Upload Video to upload the file to the remote server.
- AudioRemover will remove the audio track immediately once the upload is complete, but this may take some time, depending on the size of the file. Once completed, select the **Download File **link to download the audioless video file to your PC. Alternatively, select one of the sharing options to share it online using social media or to send it as an email. To delete the file, select the **Delete file now **link instead.
**Better Video Editing on Windows and Mac**
Now you know how to remove audio from video on Windows and Mac computers, you’ll be better placed to improve and edit videos with poor audio. You could leave the videos silent, or use a good video editor to add another audio track, such as a song or recorded commentary.
If you’re new to video editing, there are plenty of video editing tips you can try out, from organizing your video collection at the start to choosing the right video editor for your PC or Mac. You’ll just need to make sure you have a powerful PC or laptop for video editing, as it can place huge demands on your system resources.