If you’re not satisfied with your current Windows username, want to switch things up, or have several accounts with similar names, it’s not a problem. Changing your username is straightforward. This tutorial will show you how to rename a Microsoft or local account in Windows 11 and Windows 10.

**Do You Use a Microsoft Account or a Local Account?**
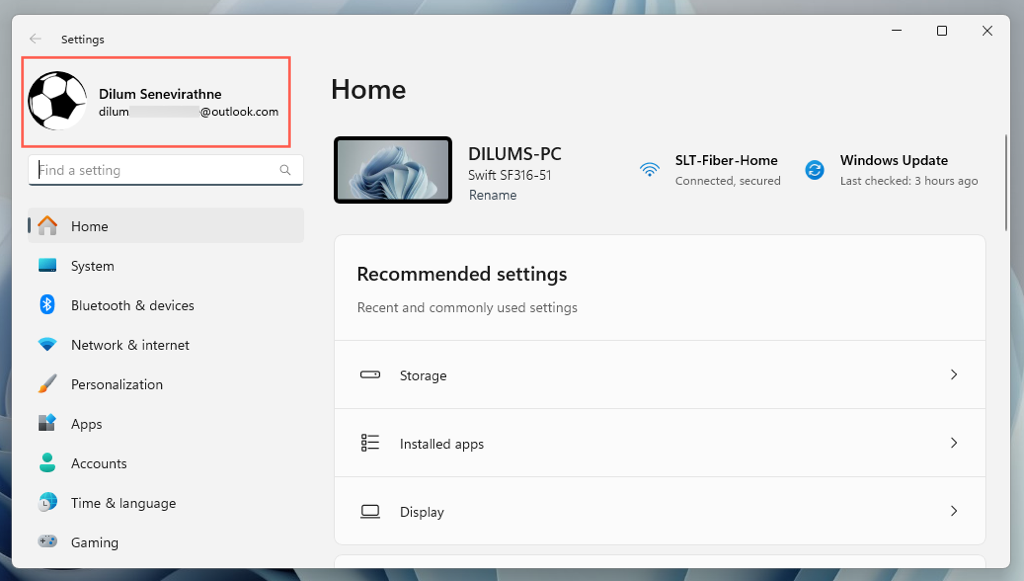
Before changing your username on Windows 11 or 10, you must determine whether you’re using a Microsoft or local account. To do that, open the Settings app (right-click the Start button and select Settings), then look at the window’s top-left corner.
If you see a name and email address, you’re signed in with a Microsoft account. If it says “Local Account,” you’re using a local account.
A Microsoft account username is linked to an online profile and helps you sync settings and files across Windows devices. This Windows account type uses the same name as your Microsoft account name as the username.
A local account, meanwhile, is specific to a single computer. It allows for a custom username and functions entirely offline.
The process to change your username in Windows 11 varies depending on whether you have a Microsoft account or a local account.
How to **Change the Microsoft Account User Name in Windows 11 **
If you’re signed into Windows 11 or 10 with a Microsoft account, then the only way to change your user name is to change your Microsoft account name. To do that:
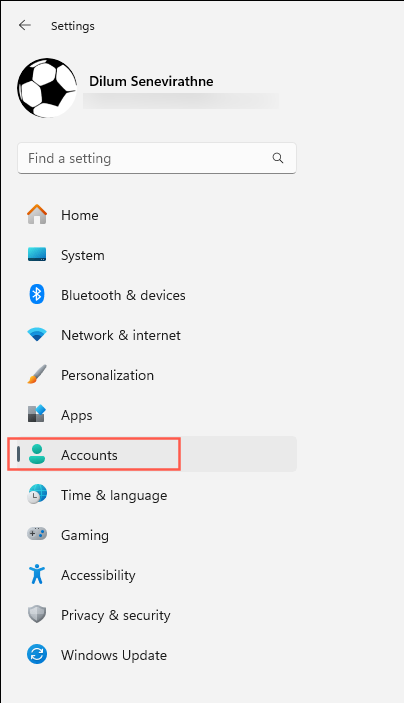
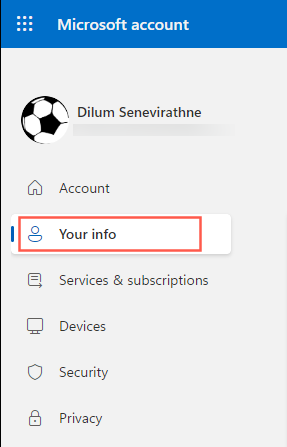
- * Open the** **Settings app and select Accounts.
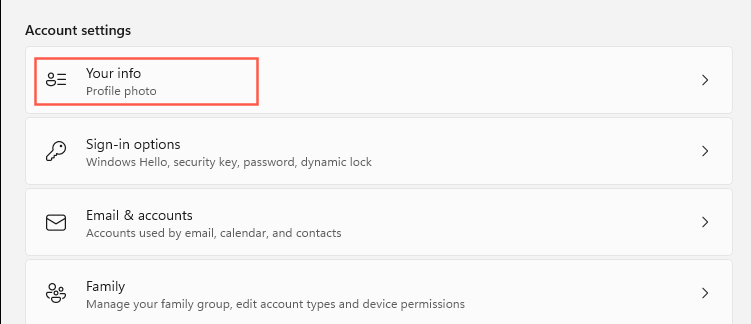
- Select the option labeled **Your info**.
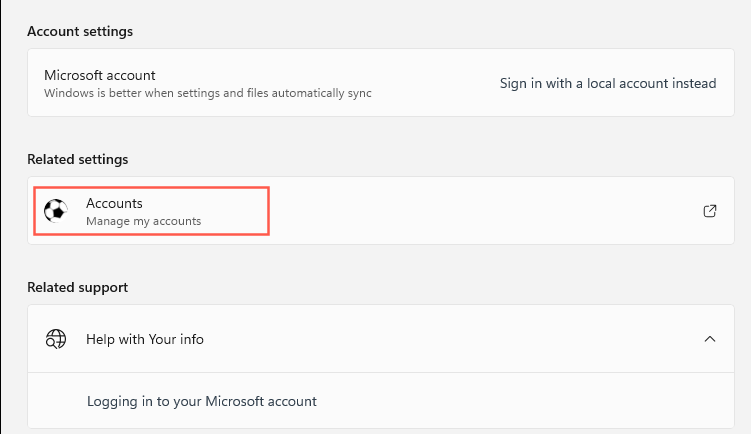
- Select **Accounts – Manage my accounts** under the **Related settings** section. )In Windows 10, select **Manage my Microsoft account**.)
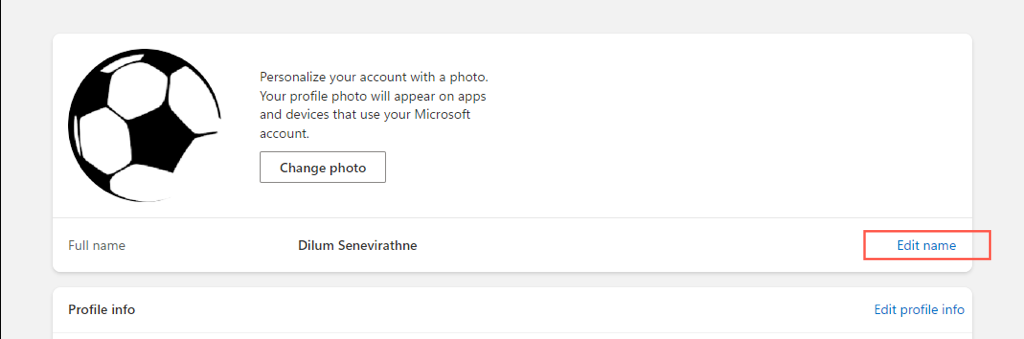
- A browser window should automatically launch and load the Microsoft account portal online—sign in using your username and password if prompted and select **Your info**.
- Select **Edit name **next to **Full name**.
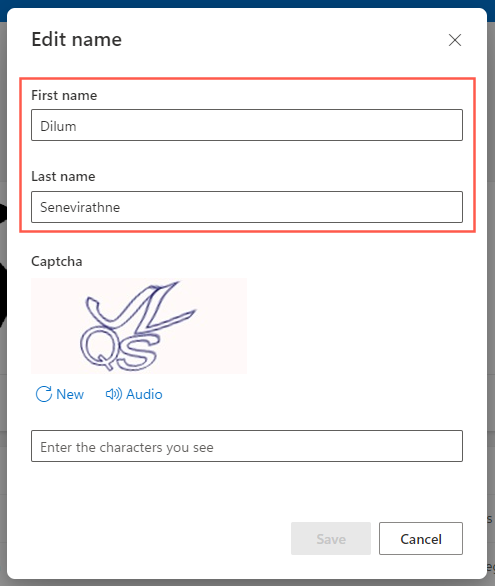
- Enter the new name into the **First name **and **Last name **fields, verify that you’re not a robot, and select **Save**.
- Quit all applications and restart your PC.
Your Windows 11 or 10 username should update, including the username on any other devices you’ve signed into with the same Microsoft account. The name in your email account and other Microsoft services will also change.
How to Change the Local Account Username in Windows 11
If you have a local account in Windows 11 or 10, you can pick one of three methods to change the user name. These involve the following:
- Computer Management applet.
- User Accounts dialog (netplwiz).
How to Use the Control Panel to Change the Username
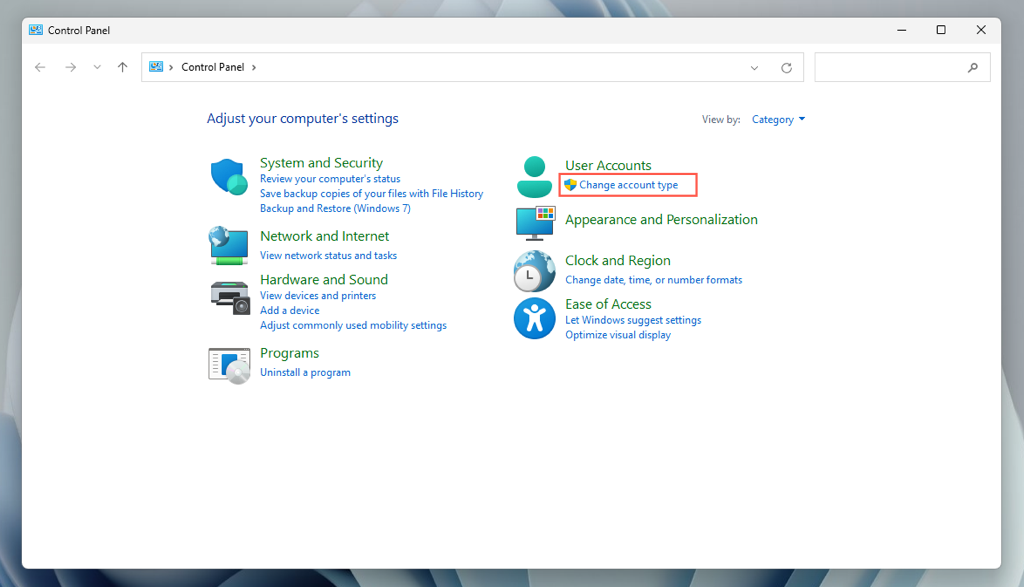
The most convenient way to change a username for a local account is through the Control Panel in Windows 11 and 10. Just:
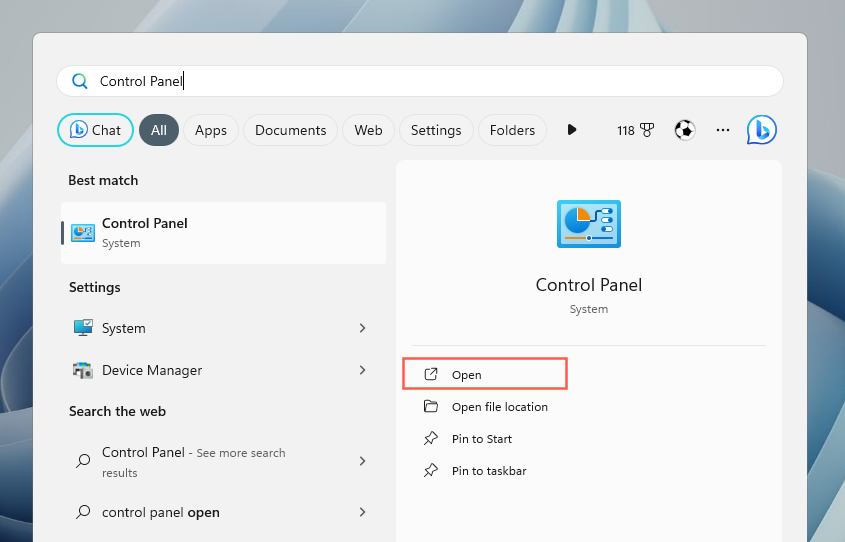
- Open the Start menu, type Control Panel, and select Open.
- Select the **Change account type** option under **User Accounts**.
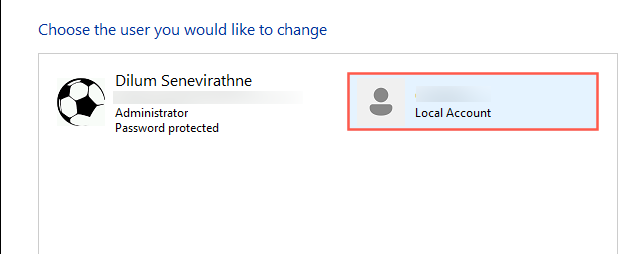
- Select the local account whose username you want to change.
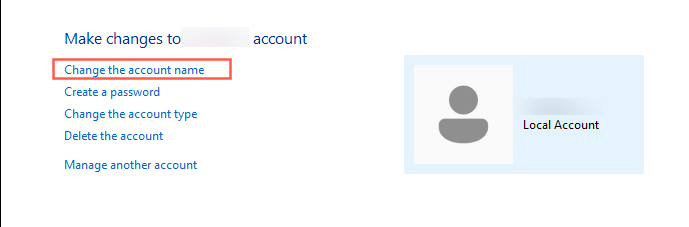
- Select the option labeled **Change the account name**.
- Fill in the **New account name field** and select **Change Name**.
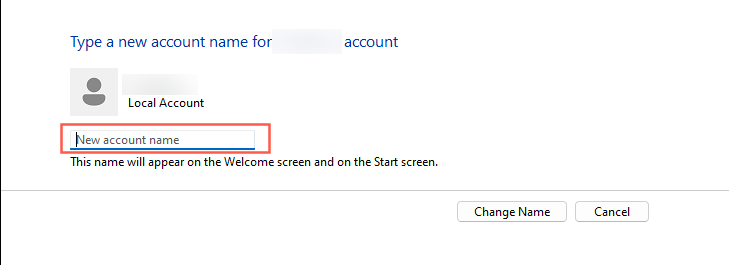
- Sign out and sign back in to enable the changes.
**How To Use Computer Management To Change Username**
If you own the Pro edition of Windows 11 or 10, you can use the Computer Management applet to change a local user account name. Here’s how:
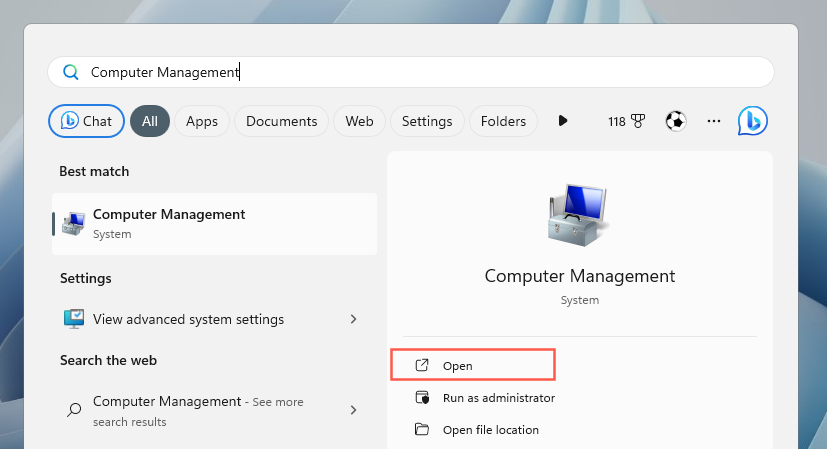
- Open the Start menu, type **Computer Management **into the search box, and select Open.
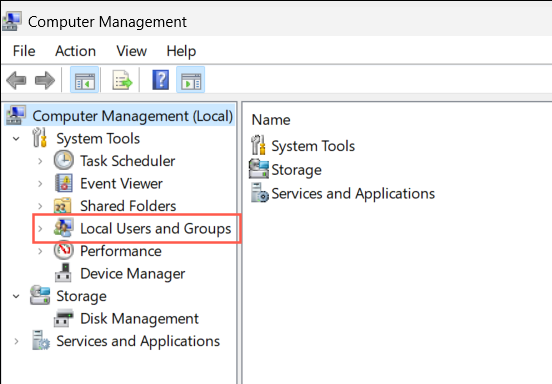
- Expand the **System Tools** category and select **Local Users and Groups**.
- Double-click **Users** on the right pane.