With over a billion downloads, Gboard, the Google keyboard, is one of Google’s most-downloaded apps. It’s pre-installed on almost every Android device, and iOS users can download it from the App Store.
While it’s rightfully known as one of the best keyboards out there, Gboard includes several hidden features that you might never come across organically. We’ll show you how to become a Gboard power user by implementing the Gboard tips and tricks below.

How to Access Gboard Settings
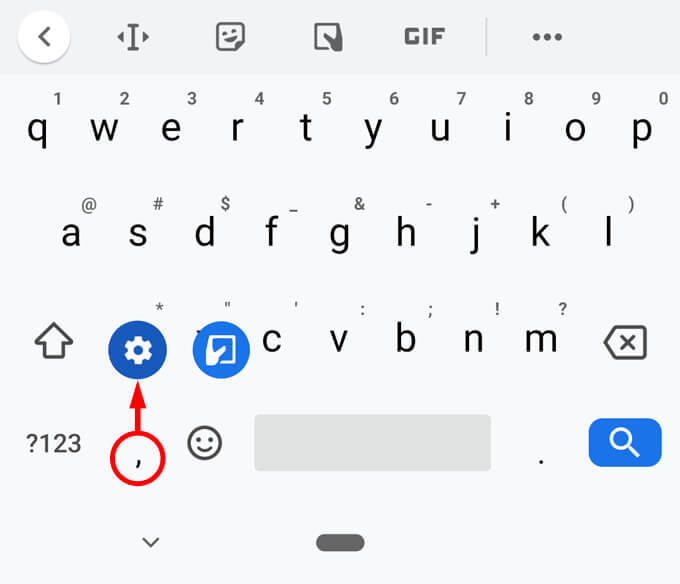
To enable many of these features, you’ll need to access Gboard’s settings. You can quickly get to Settings by long-pressing the comma key and tapping the gear icon.
Okay, now that you know where Gboard’s settings are, let’s review some little-known features of this handy little keyboard.
1. Move the Cursor More Easily
Going back to edit text you’ve already typed can be frustrating as positioning the cursor right where you need it to be is a precision operation.
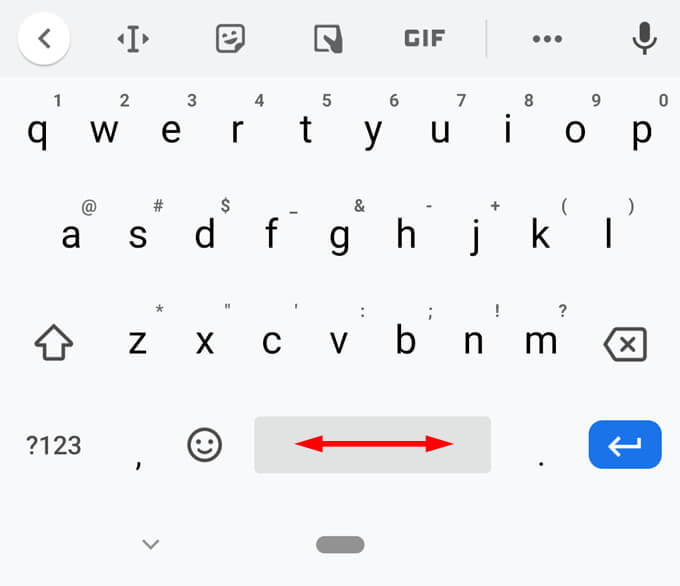
Fortunately, Gboard’s spacebar can be used like a trackpad for left-right movement. Tap somewhere in the line you want to edit, and then move your finger left and right across the spacebar until the cursor is exactly where you want it.
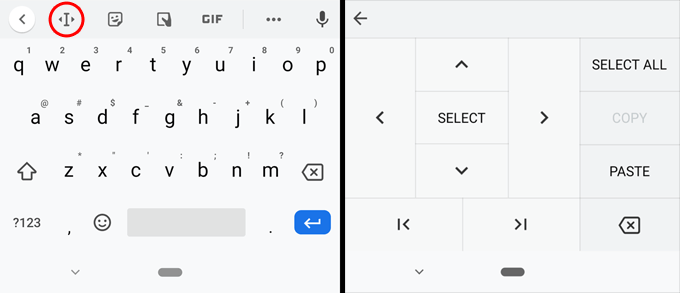
If that’s not doing it for you, Gboard offers another way to achieve precise cursor control. Look for the icon that looks like a capital I with arrows before and after it. When you tap that icon, you’ll see all the options as in the right half of the screenshot below, allowing you to navigate through your text with ease.
2. Switch Language
For people who type in different languages, Gboard has hundreds of language-specific keyboard layouts that you can add. Navigate to Gboard’s settings and tap Languages. Select the Add Keyboard button and search for the language you want to add.
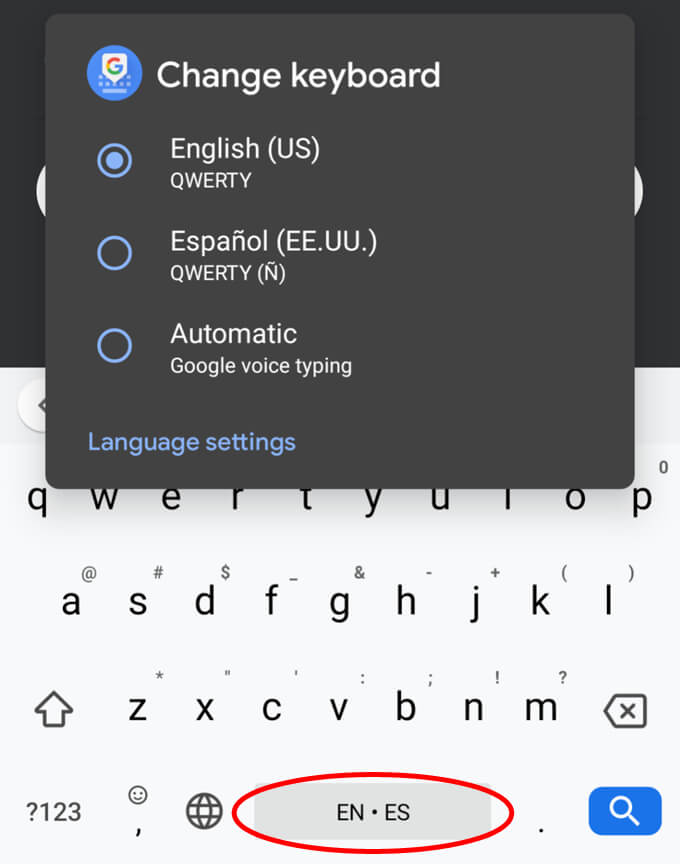
Once you have multiple keyboards in Gboard, you can long-press the spacebar to quickly switch between them or cycle through keyboards by tapping the globe icon to the left of the spacebar.
3. Use Voice Typing
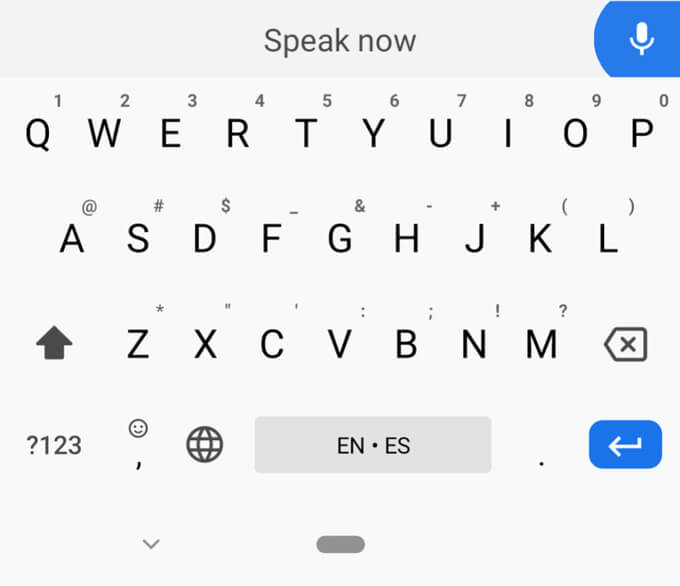
Voice typing is a huge time-saver. The real trick is remembering to use it. Tap the microphone icon and dictate to your heart’s content.
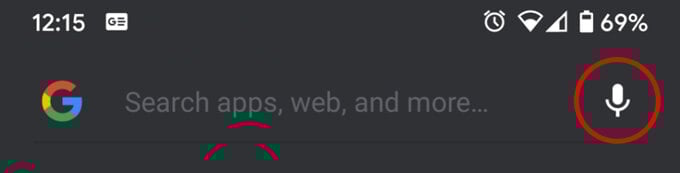
If you don’t see the microphone icon, it might be integrated directly into the app you’re using instead of on the Gboard keyboard. For example, in the Google Search app on Android, the microphone icon is to the right of the search field itself.
4. Add Words to Your Personal Dictionary
Are there words you find yourself constantly having to type—words that just don’t ever appear as suggestions even though you use them all the time? Fear not, you can solve this problem.
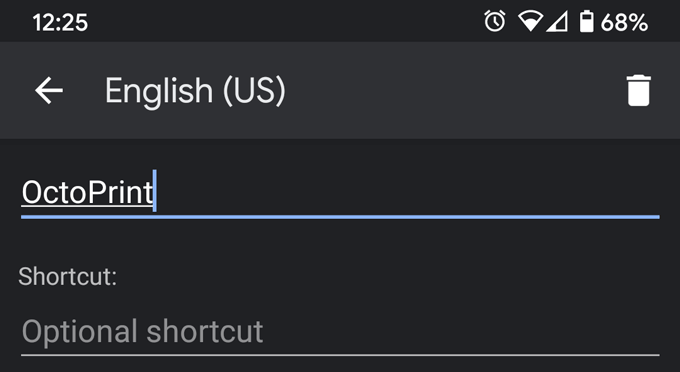
Access Gboard’s settings, select **Dictionary **> **Personal Dictionary **> [the keyboard you want to add the word to], and then tap the plus icon to add a word. Now that word will show up as a suggestion when you start to type it. Be sure to add any email addresses you frequently type.
5. Create Smart Substitutions
Notice in the screenshot above that when you add a word to your personal dictionary, you can also add a shortcut. When you type the shortcut, Gboard will offer the full word or phrase as a suggestion.
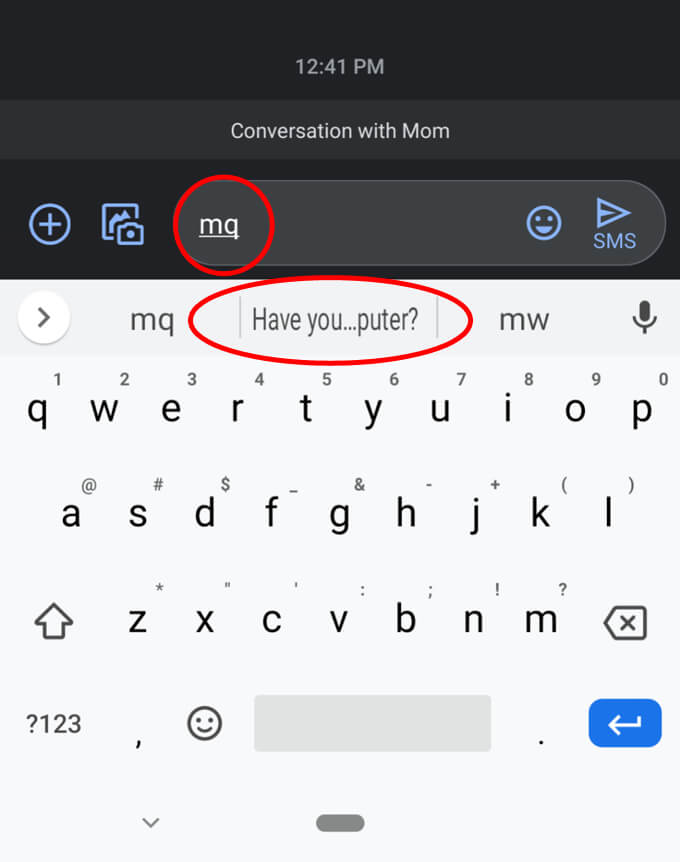
For example, if you provide a lot of tech support for family members, you might find yourself suggesting that a computer restart might solve the problem. In the screencap below, we’ve created a shortcut, **mq **(mom question). When we type mq, Gboard suggests, “Have you tried restarting your computer?” Ha!
**Here’s another shortcut tip: **Create @ shortcuts for all your email addresses. Create the shortcut @ for your main email address, and when you type @, it will appear as a suggestion in Gboard. Give your second email address the shortcut @@. Give your third email address the shortcut @@@, and so on. It’s a super-quick way to enter whichever email address you want without having to type the whole thing out.
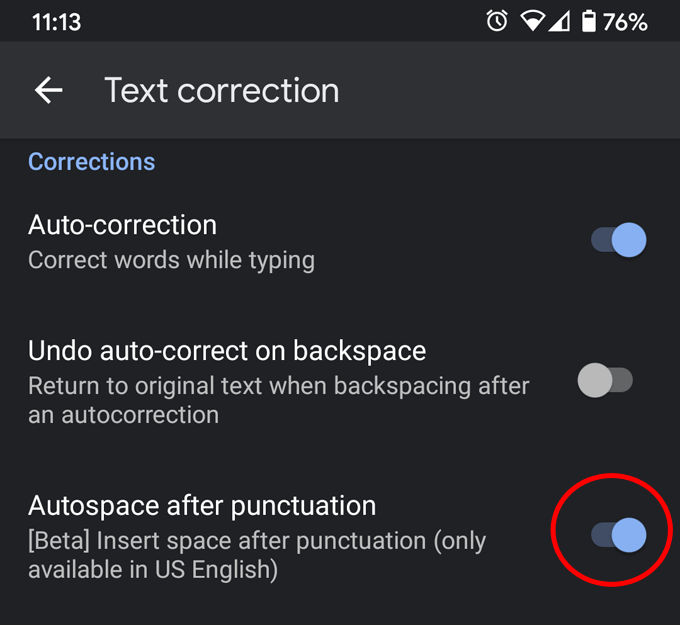
6. Enable Autospace After Punctuation
In most apps, Gboard will automatically add a space after you type a period. (One exception is in web browsers since you typically wouldn’t want a space after a period in a URL.) Moreover, if you tap the spacebar twice, Gboard will type a period followed by a space, so you’re all set to start typing the next sentence.
However, Gboard doesn’t automatically add a space after *other *punctuation marks unless you specifically ask it to. Go to **Settings **> **Text correction **> Autospace after punctuation, and toggle that option on.
7. Get Your GIFs from Gboard
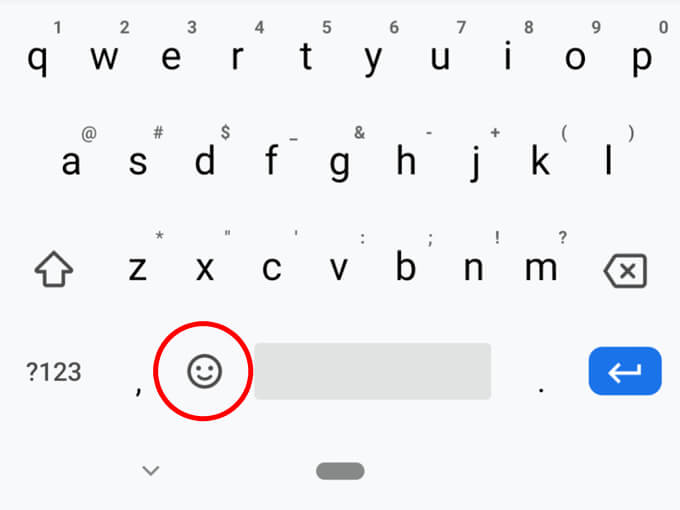
This option will only work if you only have one keyboard language installed as it replaces the globe key (also known as the language switch key) described in Tip #2 with an emoji key. First, open Gboard’s settings and select Preferences. Look in the Keys section and toggle on the option labeled Show emoji switch key.
With that option enabled, you’ll see an emoji key to the left of the spacebar. Tap the emoji key for quick access to all your emojis, stickers, and GIFs.
8. Access Punctuation Faster
How much time have you spent searching for a particular symbol key in the keyboard? One of the worst offenders is the % symbol. First you have to tap the ?123 key. Then you have to tap the =